2013年8月11日星期日

Lemon Chiffon Cake (Printable Version)


Lemon Chiffon Cake (Printable Version)
Adapted (with changes) from The Cake Bible by Rose Levy Beranbaum

Rose's recipe as written is excellent, however, I did make a few changes to suit my personal tastes. I upped the sugar by 2 tablespoons, the lemon zest by 1 tablespoon and the vanilla extract by 1/2 teaspoon. I also used canola oil in place of safflower oil.

Ingredients:
2 1/4 cups (8 ounces) cake flour
1 1/2 cups plus 2 Tbs granulated sugar
2  Tbs lemon zest
1/2 tsp baking soda
1/2 tsp salt
1/2 cup canola oil
7 large eggs separated, room temperature
3 large egg whites, room temperature
2/3 cup water
2 Tbs lemon juice
1 1/2 tsp pure vanilla extract
1 1/4 tsp cream of tartar

Preheat your oven to 325 degrees.  Grab your 10-inch tube pan with a detachable bottom, but do not grease it as the batter needs to climb up the sides :)

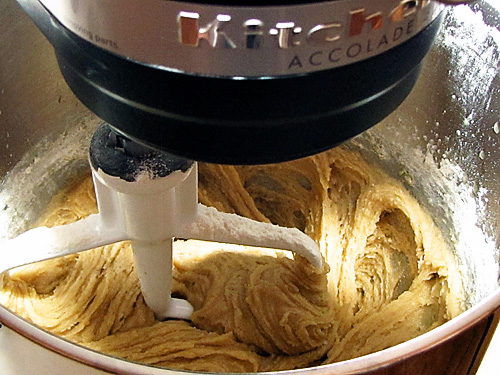
In a large mixing bowl, combine 1 1/2 cups of the sugar and the lemon zest. With your fingertips, work the zest and sugar together until the sugar is grainy and very aromatic.  Add the cake flour, baking soda and salt to the bowl.  If using a stand mixer, use the beater attachment and beat on low until the ingredients are well incorporated. You can also do this by hand with a whisk. Once incorporated, make a well in the center of your mixing bowl.  Add the oil, egg yolks, water, lemon juice and vanilla to the well. Mix for about 1 more minute on medium speed until the batter is smooth and there are no lumps. 

In a second large mixing bowl, beat the egg whites until they are foamy.  Add the cream of tartar and continue to beat on medium speed until they reach soft peak stage. You will know your egg whites have reached this stage when the beaters start to leave a trail or when the peaks fall over when the beaters are raised. Add the remaining 2 Tbs of sugar, and continue to beat the egg whites until they form stiff peaks when the beaters are raised.

Using a large spatula or whisk, add 1/3 of your egg whites to your cake batter and gently stir them until they are incorporated. Add the remaining egg whites to the batter and very gently fold them into the batter until they are incorporated and no traces of egg whites remain.  

Pour the batter into the pan and bake for 50 to 55 minutes or until the cake bounces back when lightly pressed in the center.  You can try the 'ole toothpick test, but it can be tricky since you can't get all the way into the center. Mine baked in 50 minutes to perfection. Remove the pan from the oven and immediately invert it onto a wine bottle (or something similar) to allow for proper cooling, which can take up to 90 minutes.

Serve this heavenly cake with a dusting of powdered sugar or drizzled with your favorite glaze.  Either way, enjoy and Happy Lemon Chiffon Cake Day! 

The Chewy: Chocolate Chip Cookies


The Chewy: Chocolate Chip Cookies

I was born and raised a Toll House girl. Plain and simple. No complaints. They are perfectly delectable and an American classic. My mom made them for us just as my grandma made them for her. I have wonderful memories of my Mom and me bellied up to the counter rolling dough balls to place on cookie sheets for baking. If I was really luck, we would forgo the rolling and press all the dough into a baking dish to make pan cookies (my favorite).


With such fond memories and a love for the Toll House recipe, why would I search for another chocolate chip cookie? That is a fair question. All I can say is that as I continue to write this blog, I have become a bit of a crazy person collecting recipes and reading baking posts from other talented bakers. It seems as though there is a bit of a debate in the blogging world as to which recipe produces the best, the supreme, the ultimate chocolate chip cookie.

I decided that I must join in on this quest even if I had to betray my beloved Toll House. And, who better to begin with than Mr. Food Science himself, Alton Brown. He has never let me down before. So, off I went to conquer, "The Chewy".


These cookies are reminiscent of the Toll House variety, but this recipe is unusual in that it calls for bread flour instead of all-purpose and to melt the butter before creaming it with the sugars. I had never heard of this before. What sort of craziness was this? However, after doing some research I discovered that the bread flour allows for the chewy texture of the cookie. Go figure. I am still not sure why he has you melt the butter first, but the cookies were delicious, so I am not gonna argue with his mad science.


Slowly and the flour a little at a time, and mix until just right.


Add your semi-sweet chocolate chips (I used Toll House so I didn't feel like I was a total cookie back-stabber) or even better high quality chocolate chunks..... mmmmm! You want to make sure you get the proper chocolate to cookie dough ratio for each bite. It is a crucial step in my mind.


Alton's recipe tells you to chill the dough for 1 hour. I upped that big time to 12 hours, at least. In my opinion, it allows for the caramel undertones in the dough to deepen, and it prevents it the cookies from spreading while baking. I will actually chill mine for 24 next time I make these.


I also stick the formed dough balls in the freezer for 10 minutes before placing in the oven. Overkill? Maybe, but my cookies were pretty much perfect :)


They were chewy around the edges and soft and tender in the middle with just the right amount of sweetness. The salt to sweet balance was perfect. I heart these cookies!


Sorry, Toll House. You've been bumped by "The Chewy".

Hmmm... do I dare continue on this quest? Is there a cookie out there even better than "The Chewy"?

I will ponder the question and get back to you....


The Chewy  
(Recipe adapted from Alton Brown)  

Yield: About 2 dozen cookies

2 sticks (8 ounces) unsalted butter
2 1/2 cups (12 ounces) bread flour
1 teaspoon kosher salt
1 teaspoon baking soda
1/4 cup (2 ounces) granulated sugar
1 1/4 cup (8 ounces) light brown sugar
1 large egg
1 large egg yolk
2 tablespoons (1 ounce) whole milk
1 1/2 teaspoons real vanilla extract
2 cups (12 ounces) semisweet chocolate chips or chunks


Melt the butter in a medium saucepan over low heat. Pour the butter into the bowl of your stand mixer and set it aside to cool slightly, about 10 minutes.

Sift together the flour, salt and baking soda.

Add the sugar and brown sugar to the mixing bowl, and beat with the paddle attachment on medium speed for 2 minutes.

Meanwhile, whisk together the whole egg, the egg yolk, milk and vanilla extract in a measuring cup. Reduce the mixer speed to low-medium and slowly add the egg mixture. Mix until thoroughly combined, about 30 seconds.

Set the mixer to low speed, and slowly add the flour to the batter a little at a time.  Stop a couple of times to scrape down the sides of the bowl. Once the flour is worked in, stop the mixer and add the chocolate chips. Stir until the chips are thoroughly combined. Cover the dough with saran wrap and chill for at least 12 hours, if not longer. I chill mine overnight. 

Preheat the oven to 375 degrees F and place racks in the top third and bottom third of the oven.

Scoop the dough into large tablespoon (1 1/2-ounce) portions and place onto parchment-lined cookie sheets, 6 cookies per sheet. (I placed my cookie sheets in the freezer for 10 minutes before baking.) Bake for 12-15 minutes, rotating the pans halfway through. Remove from the oven, and allow cookies to cool on pan for 5 minutes before removing from pans. Remove cookies from pan and place on cooling rack to cool completely, or pour yourself a glass of cold milk and enjoy warm... YUM!

Note: I baked mine for 13 minutes, rotating the pan after six and a half minutes. 

Mom's Olive Oil Orange Bundt


Mom's Olive Oil Orange Bundt-

This recipe belonged to a neighbor of Renato's mother-Annette, a lovely French woman from Marseilles, France.  But Renato's mother baked it so ofter it became Mom's Olive Oil Orange Bundt !

Ingredients3 cups all purpose flour
1 tablespoon baking powder
1/2 teaspoon salt
4 large eggs, separated
2 cups granulated sugar
1 cup plain yogurt
3/4 cup good quality extra virgin olive oil
freshly grated zest of 2 oranges
1 teaspoon vanilla paste or 1 1/2 teaspoons of pure vanilla extract
1/4 cup confectioners' sugar, sifted for dusting

Directions:

Preheat the oven to 350 degrees F. Generously spray the inside of a 10 inch Bundt pan with nonstick cooking spray; alternatively, butter it well, dust it with four and knock out the excess flour.

In a large bowl, whisk together the flour, baking powder, and salt. Set aside.

In the bowl of a standing mixer fitted with the paddle attachment, beat the egg yolks until they are pale and light; slowly pour in the sugar until it is completely incorporated. Add the yogurt and olive oil and mix until thoroughly combined. Add the orange zest and vanilla, and mix until just incorporated.

Add the flour mixture to the wet ingredients in two parts, beating after each addition or until just combined (this will take about 10 seconds). Scrape down the bowl and beat again for 5 seconds.

In another large bowl, beat the egg whites until stiff peaks form. Scoop 1 cup of the egg whites into the batter. use a rubber spatula to gently fold them in. After about 30 seconds of folding, add the remaining egg whites and gently fold until they are almost completely combined. Do not rush the folding process.

Pour the batter into the prepared pan and bake for 40 - 50 minutes, rotating the pan halfway through the baking time, or until a small sharp knife inserted into the cake comes out clean. Transfer the pan to a wire rack to cool completely. Gently loosen the sides of the cake from the pan (I sometimes use and offset spatula for this) and turn it onto the rack. Just before serving, dust the cake with the confectioner's sugar. The cake can be stored at room temperature, covered tightly for about 3 days

BAKED NOTES
When making this cake, try to use a really good fruity olive oil-something like Paesano extra-virgin olive oil, to bring out the citrusy tones in the cake. The simple dusting of sugar is all this cakes needs instead of a glaze.

2013年8月2日星期五

奶皇月餅


抱抱~源自"素顏天使"THX~
材料:
1) 牛油 50g,量好份量,切小塊,放室溫變軟,備用。
2) 糖粉 30g,也可用白砂糖代替,但口感會較為粗糙,而且烤完容易有黑點。
3) 蛋液 12g。
4) 低筋麵粉 72 g,過篩一次,備用。
5) 奶粉 12g。
6) 吉士粉 8g,買要煮的那種。
7) 雲呢拿香油 1g。
8) 奶皇餡 240g。

月餅份量以外:
1) 蛋液 (約 1 隻雞蛋的份量) 要打勻一點,作酥皮面上色用。
2) 白砂糖 10 g 和 白開水 10 g,混好作面頭脆皮用糖水。
3) 高筋麵粉 適量,作最後包餡料灑粉在檯面和雙手用。(如沒有可用低筋麵粉代替,但要過篩,好麻煩)


做法:
1) 牛油置室溫變軟,和糖粉放大碗,用電動打蛋器以最慢速拌勻至牛油狀。Tips:打蛋器先放到碗中再開動,邊用手扶著碗邊。
2) 加入蛋液,低筋麵粉,奶粉,吉士粉,雲呢拿香油再打發。Tips:如果麵糰太乾身可加入適量牛油拌勻。
3) 奶皇餡分為 8 小糰 (每份約30 g)。
4) 檯面灑點高筋麵粉,雙手也沾點粉。把麵糰分 8 小份 (每份約 20g),也是用包湯圓的手勢包好 (3),封口向下,擱在檯的一邊備用。
5) 把粉糰放檯面用手堆幼身點,月餅模撒高筋麵粉,推壓成形。Tips:模具,檯面和雙手都必需沾上大量的粉。另外,動作必需夠快,否則麵糰濕了就會黏模,模具沾了麵糊,之後做的所有月餅的圖案都會變形和爛皮的了。
6) 刷上蛋液,放焗爐,烤焗時間見下段。Tips:掃蛋液時不用沾太多太濕,薄薄的慢慢的掃,圖案複雜的掃 1-2 層,圖案簡單的則掃 3 層。
7) 烤好了以後,立即取出,並掃上糖水作脆皮用。

烤焗時間:焗爐預熱 200,以180 度下火焗 6-8 分鐘,取出。改以 220 度上火,焗盤轉至另一方向,再入爐焗至表面金黃即成,約需 6-8 分鐘,總時間以不超過 15 分鐘為準。另外,也可用錫紙包裹焗爐的本身網架,焗的時候放到焗盤的下方去,作用為減低下火,因為這一款酥皮的底不是很受熱,很易烤焦。

從雪櫃取出後,吃之前先放室溫略為解凍 (否則有可能會整個散掉爆開),放微波爐高熱叮約 30-40 秒即可 或 焗爐預熱 150 度後焗 5-8 分鐘。放雪櫃可存 3-4 日。
小提示:
1) 之前我唔係用呢個食譜,但呢個食譜比較詳細易做,只要跟足步驟,一定會成功架
2)奶皇餡我係用整冰皮個D既~
3)改以上火時一定要睇火呀,唔係好易變成非洲月架喇^^


奶皇餡
1.     麵粉 15g
2.     粟粉 15g  
3.     吉士粉 30g 
4.     棷漿 200ml  
5.     花奶 100ml     
6.     蛋黃 2隻
7.     砂糖 70g  
8.     牛油 15g
9.     鹹蛋黃 6隻
做法 :
1.     先將麵粉、粟粉、吉士粉拌勻及過篩
2.     棷漿、花奶拌勻, 加入5湯匙, 慢慢拌入已過篩的粉內搓勻
3.     將蛋黃拌入粉漿內 ,繼續搓勻
4.     搓勻粉糰後, 再加入砂糖及已熱溶牛油拌勻
5.     鹹蛋黃蒸熟, 將餘下的棷漿、花奶和己熟鹹蛋黃放入攪拌機打勻, 過篩, 再用小火煲熱 , 然後慢慢加入剛搓勻粉糰拌勻
6.     放入大碟, 將粉糰用大火蒸20分鐘
7.     蒸完待粉糰放涼後,再將奶皇餡搓大約5分鐘至幼滑
8.     完成的奶皇用保鮮紙包好放入雪櫃下格待用

月餅皮﹕
1.     低筋粉108g
2.     奶粉18g
3.     吉士粉12g
4.     牛油75g
5.     蛋 18g
6.     雲尼拿油1.5g
7.     糖粉36g
做法﹕
1.     已熱溶牛油、糖粉放在盤內拌勻,加入雲尼拿油及蛋
2.     最後加入低筋粉、奶粉、吉士粉拌勻
3.     完成的粉糰用保鮮紙包好放入雪櫃下格待用
4.     取出奶皇餡,分成12份搓圓(每個約30克)
5.     拿出粉糰, 分成12份搓圓(每個約20克)
6.     用木棍把每個小粉糰滾成圓形
7.     把圓形皮上放入奶包好搓圓, 滾上高筋粉在外面月餅模也撒上高筋粉
8.     把包好餡的粉糰放入模內,大力壓成模內的花紋取出後放在已鋪上牛油紙的焗盆上
9.     焗爐預熱220度,於餅面及餅邊掃上2次已打發的蛋漿(在蛋漿內加入一茶匙白沙糖) 焗8分鐘
10. 取出,再掃上已加沙糖的蛋漿,轉至250度焗5分鐘至金黃色即可