1 3/4 cups heavy cream
5 bars (1.5 ounces each) Godiva® Milk Chocolate, chopped
Make Milk Chocolate Ganache :
Heat heavy cream in a 2-quart saucepan over medium heat to a boil. Remove pan from heat and add chocolate. Let stand for 1 minute and then stir with a wooden spoon until completely melted and smooth. Cover chocolate ganache with plastic wrap pressing the wrap onto the surface. Refrigerate for at least 8 hours or overnight.
2010年7月30日星期五
flourless chocolate cake
Flourless Chocolate Cake
Ingredients:
Chocolate 200g
Butter 150g
Egg white 5
Egg yolk 5
Sugar 100g
Cocoa Powder 2tbsp
Methods:
1. Melt the chocolate and better, let cool
2. Beat the egg yolks with sugar (80g) until thick and look milk white
網誌 我的網誌內容搜尋: 引用 檢舉
Flourless Chocolate Cake (食譜)網誌分類:靜愛Chocolate | 圖片 網誌日期:2010-02-09 12:45
今天是我boss的生日, 所以做了個蛋糕給他~
他超愛chocolate, 對於chocolate lover來說, 這款蛋糕一定可以滿足到~
整個蛋糕都是濃濃的朱古力香~
做這個蛋糕只需要朱古力, 蛋, 砂糖和可可粉, 材料簡單易做~
我做了一個mini的給自己試味~
Flourless Chocolate Cake
Ingredients:
Chocolate 200g
Butter 150g
Egg white 5
Egg yolk 5
Sugar 100g
Cocoa Powder 2tbsp
Methods:
1. Melt the chocolate and better, let cool
2. Beat the egg yolks with sugar (80g) until thick and look milk white
3. Mix 2. into melted chocolate butter
4. Add cocoa powder into 3.
5. Beat egg white until blistering and add sugar (20g) into it
6. Beat the egg white until soft peak
7. Add 6. into 4. with 3-4 times
8. Bake 30-40 minutes with 180℃
9. Remove from oven and use plate to press on the cake until cool
材料: 黑朱古力 90g
無鹽牛油 45g
蛋黄 2隻
蛋白 2隻
砂糖 60g (分成20g和40g兩份)
幼鹽 1/4茶匙
Ingredients:
Chocolate 200g
Butter 150g
Egg white 5
Egg yolk 5
Sugar 100g
Cocoa Powder 2tbsp
Methods:
1. Melt the chocolate and better, let cool
2. Beat the egg yolks with sugar (80g) until thick and look milk white
網誌 我的網誌內容搜尋: 引用 檢舉
Flourless Chocolate Cake (食譜)網誌分類:靜愛Chocolate | 圖片 網誌日期:2010-02-09 12:45
今天是我boss的生日, 所以做了個蛋糕給他~
他超愛chocolate, 對於chocolate lover來說, 這款蛋糕一定可以滿足到~
整個蛋糕都是濃濃的朱古力香~
做這個蛋糕只需要朱古力, 蛋, 砂糖和可可粉, 材料簡單易做~
我做了一個mini的給自己試味~
Flourless Chocolate Cake
Ingredients:
Chocolate 200g
Butter 150g
Egg white 5
Egg yolk 5
Sugar 100g
Cocoa Powder 2tbsp
Methods:
1. Melt the chocolate and better, let cool
2. Beat the egg yolks with sugar (80g) until thick and look milk white
3. Mix 2. into melted chocolate butter
4. Add cocoa powder into 3.
5. Beat egg white until blistering and add sugar (20g) into it
6. Beat the egg white until soft peak
7. Add 6. into 4. with 3-4 times
8. Bake 30-40 minutes with 180℃
9. Remove from oven and use plate to press on the cake until cool
材料: 黑朱古力 90g
無鹽牛油 45g
蛋黄 2隻
蛋白 2隻
砂糖 60g (分成20g和40g兩份)
幼鹽 1/4茶匙
2010年7月29日星期四
parmasan cheese chiffon
食譜 ( 16.5 cm戚風模)
預備 : 牛奶,菜油隔水加熱至30-40度左右
所有粉類混合過篩2-3次
預熱焗爐170度 (約10-15分鐘)
材料 ;
A : 蛋黃 ~ 3個 / 砂糖 ~ 20g
B : 牛奶 ~ 75g / 菜油 ~ 40g
C : 低筋粉 ~ 70g / parmesan 芝士粉 ~ 50g / 泡打粉 ~ 1.5g
D : 蛋白 ~ 4個 / 砂糖 ~ 40g
E : 新鮮蒔蘿 ~ 3棵 (切碎)
做法 :
1. 蛋黃打散,加入砂糖攪拌成淡黃色
2.加入牛加熱了的牛奶,菜油拌勻
3.加入已過篩粉類拌勻 ,加入蒔蘿碎拌勻 (可隨個人喜好加入其他香草)
4.蛋白打至起泡後,砂糖分三次加入打至企身
5.蛋白霜分三次加入3中,用膠刮輕力快手以切拌方法拌勻
6.將麵糊倒入模內,用膠刮抺平表面,提起往桌面輕敲一下,消除麵糊間空隙
7.放入已預熱175度的焗爐焗約30-35分鐘
8.出爐後倒扣放涼
檸檬戚風蛋糕
檸檬戚風蛋糕
參考自 : 書名 :雪芳蛋糕 作者 : 曾美子
材料:
蛋黃 3個
砂糖 20g
葡萄籽油 40g
檸檬汁 30g
水 30g
檸檬皮茸 一個
低筋麵粉 70g
蛋白 120g
砂糖 55g
準備 :
1) 檸檬汁、葡萄籽油、水隔水加熱至(30-40度左右)
2) 將粉過篩 2 次,可使用前再過篩.
3) 焗爐預熱 170 度.
做法 :
1) 蛋黃打勻加入砂糖攪拌成淡黃色後.
2) 檸檬汁、油、水、檸檬皮茸加入(1)拌匀.
3) 用另一個盆, 把蛋白打至起泡,將糖分三次加入發打,直至蛋白豎起後有立角硬度為止.
將1/3份量之蛋白放入蛋漿攪勻,下1/2份量粉類用Fold-in 形式混合,再下1/3蛋白混合,
下剩餘的麵粉再混合,最再加剩下的1/3蛋白直至完全混合.
※1/3蛋白→1/2粉類→1/3蛋白→1/2粉類→1/3蛋白.
4) 麵糊倒入模,用刮刀整平雙手提起模在桌上輕敲消除麵糊間空隙.
5) 170 度焗25-30 分鐘,出爐後倒扣之冷卻即成.
2010年7月27日星期二
增肌食物
含豐富鋅,能提升荷爾蒙分泌,促進蛋白質合成,有助修補肌肉。
調 節 維 生 素 A 及 C 的 含 量
參 與 多 種 人 體 代 謝 過 程
調 節 免 疫 系 統
促 進 生 長 發 育
人 體 主 要 從 胃 腸 道 和 呼 吸 道 吸 收 鋅 , 儲 存 於 各 器 官 組 織 內 , 由 尿 、 汗 及 乳 汁 等 排 洩 。
人 體 以 視 網 膜 、 睫 狀 體 、 前 列 腺 、 胰 腺 、 腎 、 肝 等 器 官 組 織 含 有 較 多 的 鋅 。 正 常 成 年 人 含 鋅 總 量 約 2 - 2.5 g , 而 人 血 則 每 100 ml 含 鋅 7 1 3 - 880 mg 。
很 多 日 常 食 物 都 含 有 鋅 , 其 中 以 動 物 內 臟 、 牛 奶 、 谷 類 豆 類 含 量 較 高 。 ( 見 表 一 )
表 一 部 份 食 物 含 鋅 量 ( mg/100g )
食 物 名 稱 含 量 食 物 名 稱 含 量
大 白 菜 4.2 紫 皮 蘿 蔔 2.97
南 瓜 1.8 糙 米 1.8
茄 子 2.9 扁 豆 2.7
黃 豆 3.6 馬 鈴 薯 1.6
糙 米 1.8 蘑 菇 0.5
治 療 肺 心 病
鋅 能 在 人 體 內 構 成 8 0 多 種 , 並 能 減 少 自 由 基 造 成 的 損 害 , 徒 而 保 護 細 胞 質 膜 , 故 此 能 協 助 治 療 肺 心 病 。
治 療 老 年 痴 呆
鋅 能 促 進 細 胞 的 更 新 , 增 強 免 疫 功 能 。 而 大 腦 中 以 松 果 體 等 組 織 含 鋅 較 多 , 因 此 鋅 能 促 進 學 習 、 記 憶 和 條 件 反 射 等 功 能 。
治 療 糖 尿 病
鋅 既 能 影 響 胰 島 素 的 生 成 和 儲 備 , 亦 影 響 人 體 對 胰 島 素 的 敏 感 性 , 而 且 能 協 助 葡 萄 糖 的 運 送 , 因 此 對 治 療 糖 尿 病 有 一 定 幫 助 。
治 療 男 性 不 育
成 人 若 缺 鋅 可 發 生 性 腺 萎 縮 , 導 致 性 功 能 低 下 , 嚴 重 時 會 造 成 男 性 不 育 。 所 以 補 充 適 當 的 鋅 可 以 治 療 男 性 不 育 症 。
鐵質
鴕鳥肉:
若 長 期 過 量 攝 取 含 鋅 的 食 物 , 便 會 影 響 銅 和 膽 固 醇 的 代 謝 , 形 成 高 膽 固 醇 血 症 , 引 發 動 脈 硬 化 和 冠 心 病 等 疾 病 。
2010年7月26日星期一
Swiss Roll- 中島真介
Swiss Roll
Ingredients:
Egg 233 g
Egg Yolk 115 g
Sugar 100 g
Flour 55 g
Cornstarch 17 g
Baking Powder 3 g
Melted Butter 35 g
Glucose 10 g
Vanilla As needed
Cream As needed
Strawberry As needed
Method:
Melt the butter with glucose
Sieve the flour with baking powder and cornstarch
On a hot water bath beat together egg, sugar and egg yolk until reach 35℃
Beat the egg mixture until foamy
Add in butter and glucose liquid
Fold in Flour, Spread on tray
Bake in 170℃ oven for about 15 mins
2010年7月23日星期五

Chocolate Mousse Gateau Recipes
榛子蛋糕底
材 料 (8"份量):
蛋白.....3個
細砂糖.....36g
榛子粉.....9g
榛子醬.....1茶匙
菜油.....15g
牛奶.....15g
蛋黃.....3個
砂糖.....24g
低筋麵粉.....39g
做 法 :
1. 低筋麵粉過篩兩次,加入榛子粉備用。
2. 預熱焗爐170度。
3. 蛋白打到白泡,加入36g砂糖,打到企身。
4. 蛋黃加24g糖混合,加入牛奶及菜油拌勻,再入榛子醬拌勻。
5. 把1/3蛋白加進蛋黃漿內,加1/2粉類,攪幾下。
6. 再把1/3蛋白加進蛋黃漿內,加1/2粉類,攪幾下。
7. 最後把1/3蛋白加入,混合。
8. 倒入模內,拿起模在桌面上叩幾下。入爐,焗25分鐘。
9. 出爐後馬上倒扣。完全冷卻後才脫模。
朱古力慕絲
材 料:
淡忌廉.....90g
黑朱古力.....180g
淡忌廉.....450g
糖霜.....36g
魚膠粉.....9g
水.....50g
做 法 :
1. 淡忌廉煮滾, 加入切碎的朱古力攪溶.
2. 魚膠粉用水開溶.
3. 淡忌廉打起, 逐少加入糖霜後再打至7成.
4. 加入朱古力漿和魚膠溶液拌勻.
朱古力淋面
材 料:
水.....20g
淡忌廉.....15g
砂糖.....35g
可可粉.....12g
魚膠粉.....2g
做 法:
1. 將魚膠粉和砂糖攪勻後再和水拌勻, 加熱煮至沸點
2. 加入淡忌廉和可可粉攪拌均勻, 然後熄火
3. 將淋面醬過篩, 待涼
組 合:
1. 將榛子蛋糕舖在模具底部
2. 倒入一半朱古力慕絲,加入一片榛子蛋糕
3. 再將餘下朱古力慕絲倒入,雪至凝固
4. 最後淋上朱古力淋面, 再雪至凝固即可
2010年7月21日星期三
2010年7月20日星期二
chocolate chiffon
此食譜的材料份量如下(17cm 模):
蛋黃 (大size) 3 個
蛋白 (大size) 5 個
砂糖 80g
沙拉油 40ml
水 60ml
低筋麵粉 45g
可可粉 30g
泡打粉 1/2 小匙
蛋黃 (大size) 3 個
蛋白 (大size) 5 個
砂糖 80g
沙拉油 40ml
水 60ml
低筋麵粉 45g
可可粉 30g
泡打粉 1/2 小匙
2010年7月18日星期日
咖央醬 spreed
咖央醬
全蛋 2隻蛋黃 2隻coconut糖 100g椰漿 200ml班蘭香油 1茶匙
1. 全蛋及蛋黃放入盤中打散。
2. 加入糖拌至溶解。
3. 加入椰漿及班蘭香油拌勻。
4. 將咖央糊過濾,隔去泡沫。
5. 準備一鍋滾水, 將咖央糊連盤放上,隔水加熱。加熱至微暖時,要攪拌一下, 當咖央糊煮熱後要不停攪拌, 直至杰身為止(食譜說須要煮1 小時)
6. 冷卻後,裝入清潔乾爽的瓶子放入雪櫃貯存 (冷卻後的咖央糊會杰身一點)
-----------------------------------------------------
Sri Kaya recipe
(fills one and a half of 8oz jars)
Ingredients
3 eggs
2 egg yolks
100g castor sugar
50g brown sugar
200ml thick coconut milk, from grated white of 2 coconuts (If use cans, make sure it is 100% coconut milk extract. I used Ayam's brand 100% coconut cream)
3–4 screwpine leaves (pandan leaves), knotted
Method
1. Set up a double boiler - fill a pot with water around 3/4 full and bring to boil. Once boiled, turn it down to low/medium heat, the water should be just simmering with bubbles at the bottom of the pot.
2. Use a large mixing bowl (I use a large metal mixing bowl), add eggs and sugar and beat them together until all sugar is dissolved.
3. Slowly add coconut cream into mixture while whisking until well combined.
4. Place the mixing bowl on top of the double boilder with simmering hot water.
6. Tie a knot of all the pandan leaves together, add it into the mixture. Use a silicon spatula and keep stirring.
7. Scrape the side and the bottom of the mixture with the spatula constantly and pour it over the pandan leaves. That way it will stop the mixture cooking too fast with lumps at the bottom, and the hot mixture will extract the pandan flavour from the leaves.
8. The mixture will start to get thick and sticky. Test the mixture whether it is ready by using "parting the sea" technique - draw a line by scraping the mixture in one swift move using the spatula. If you can draw a clean line on the bowl for a second before the mixture flows like lava and covers the line, then it is ready.
9. Once ready, remove it from the heat. Take the pandan leaves out and discard. (Make sure you squeeze all the sticky jam goodness out of the pandan leaves before discarding it)
10. Leave it cool and it will thicken further. Then fill in a sterilised jar and keep in room temperature for up to 5 days, or in the fridge up to a month. But seriously, you will finish the whole jar before you know it.
2010年7月17日星期六
egg white chiffon
~~~食譜~~~
材料:- (17cm 戚風模)
a) 菜油 40ml
牛奶 80ml
雲呢拿油 5 drops
b) 低粉 70g
鹽 1g
c) 蛋白 200g (5隻)
糖粉 70g
做法:-
先預熱175度
將(b)預先過篩
將油和奶拌勻,再加入(2),以手動打蛋器拌至無粒為止
待(3)的麵糊變成柔滑狀後,加入雲呢拿油拌勻
將(c)的旦白用電動打蛋器打至起泡,糖粉分3次加入,持續打至比成淚滴型態較為硬身,讓圓錐狀的前端呈現鬆軟立起的程度
以手動打蛋器撈起1/3的(5)加入(4)中混合,接著再加入1/3蛋白霜,換以膠刮刀拌勻
將(6)的麵糊全部倒入剩餘的蛋白霜裡,以膠刮刀迅速拌勻
麵糊完成後立刻倒入模中,輕輕去除空氣後,焗大約40分鐘,焗到旦糕用竹籤刺不沾黏為止
倒扣待涼,脫模
2010年7月15日星期四
japanese cotton cheesecake
料:
- 牛奶120g (約110ml)
- 幼砂糖100g;
- 忌廉芝士160g;
- 牛油25g;
- 低筋麵粉40g;
- 粟粉(corn starch) 30g;
- 雞蛋4隻 (分開蛋白和蛋黃~ 蛋黃打散);
- 他他粉 (Cream of Tartar) 1/8茶匙;
- 幼鹽少許
3. 忌廉芝士、牛油和牛奶放進大玻璃碗,隔熱水至忌廉芝士和牛油完全溶化。
. 用打蛋器打至幼滑後,取出待涼。
5. 先將低筋麵粉和粟粉用篩隔好後,加入(4)中,用木匙拌勻。
6. 加入蛋黃,再用木匙拌勻。
7. 蛋白用電動打蛋器先打至起泡,再加入幼砂糖、他他粉和幼鹽打至起角。
8. 將(7)加入(6)中,用木匙完全拌勻至顏色完全混合。
9. 將粉漿倒入蛋糕模中,左右輕輕搖擺至粉漿表面平滑。
10. 將蛋糕模坐入盛水的焗盤中,放入已預熱焗爐160C中層,焗40 - 45分鐘至表面金黃及蛋糕完全凝固。
chocolate truffle cake
材料:(1磅)
黑朱古力120克
蛋黃24克
淡忌廉140克
全蛋22克
RUM酒或拔蘭地酒約一瓶蓋
糖30克
蛋糕片(即朱古力海綿蛋糕)2片
做法:
1. 先將黑朱古力座水溶,備用。
2. 打起淡忌廉,備用。
3. 先加水煮糖煮沸。(水剛好蓋過糖多一點點,煮至全部起泡即可)
4. 再將蛋黃和全蛋打起*由鮮黃色打至淺黃色),加(3)打至奶白色後,再加入(1)攪至混合。
5. 加RUM酒再加淡忌廉,攪至沒有忌廉粒便成。
6. 將一片朱古力海綿蛋糕片底,再加入朱古力慕絲便可,(我呢個o係面加左白朱古力)放在雪櫃2小時後,取出,可再加可可粉。
---------------------------------------------
材料( 6 或 7 吋蛋糕一個) (相片的是6吋)
低筋麵粉
35克
栗粉
50克
無糖可可粉
15克
蛋
4只
糖
80 克
雲尼拿香油
2 茶匙
製作過程
1.
蛋黃、蛋白分開 。
2.
低筋粉、栗粉及可可粉一起過篩3次 。
3.
糖分3次加入蛋白,打至企身 。
4.
加少量蛋白糖霜及雲尼拿香油於蛋黃中,用刮刀 拌勻。
5.
將已過篩的粉類加入拌勻,攪至有光澤。
6.
將麵糊倒入模中,用180C, 焗30-40分鐘。
------------------------------------------
Chocolate Truffle Cake W/ Rum Cream
Yield: 12
Ingredients
--------------------------FOR THE CAKE--------------------------------
1/2 c unsalted butter; softened
7 oz semisweet chocolate;
-crumbled
1 tb grand marnier
1 tb rum
1 ts vanilla extract
1 tb flour
5 egg yolks; at room
-temperature
3/4 c sugar
5 egg whites; at room
-temperature
2 tb confectioners' sugar
1 orange zest
------------------------FOR THE RUM CREAM-----------------------------
1 pt whipping cream
1 tb grand marnier
1 tb rum
1 ts vanilla extract
3/4 c sugar
Instructions
For The Cake:
Butter and flour a 10-inch springform pan with 1 tablespoon of the butter.
Line the pan with waxed paper.
Melt the chocolate and the remaining butter over low heat in a heavy
nonstick saucepan. Pour into a bowl. Stir in the Grand Marnier, rum,
vanilla and flour.
Beat the egg yolks with half of the sugar in a mixer bowl until pale
yellow. Stir into the chocolate mixture.
Beat the egg whites in a mixer bowl until soft peaks form. Add the
remaining sugar gradually, beating until stiff peaks form. Fold into the
chocolate mixture. Pour the mixture into the prepared pan.
Bake at 275 degrees for 1 hour and 20 minutes. Cool on a wire rack. Remove
side of pan.
For The Rum Cream:
Beat the cream in a mixer bowl until soft peaks form. Add the Grand
Marnier, rum and vanilla, beating constantly. Add the sugar gradually,
beating until stiff peaks form.
To Assemble:
Slice the cake. Dust with the confectioners sugar
Spoon a dollop of the rum cream on each serving. Garnish with orange zest.
原味雪芳蛋糕
原味雪芳蛋糕 (7吋中空模一個)
材料:
材料(16.5 cm 中空摸分量) good
全蛋 (特大) 3隻
砂糖 70克
沙拉油 40克
低筋麵粉 70克
泡打粉 1/4茶匙
鮮奶 50克
雲呢拿香油(隨意可省) 1/2茶匙
蛋黃 3個,砂糖 20g,沙拉油 40g,牛奶 60g,低筋麵粉 70g,泡打粉 1/4茶匙,蛋白 4個,砂糖 40g
做法:
1. 鮮奶、油、香油混合
2. 蛋黃加部分砂糖打至淡黃色, 加入鮮奶料拌勻, 再篩入粉類拌勻
3. 蛋白和餘下的砂糖打至企身
4. 先加1/3蛋白與麵糊混合, 再加入餘下的蛋白輕手拌勻
5. 倒入雪芳蛋糕模中, 以180度焗約20分鐘
6. 取出倒扣待涼, 然後脫模
7. 食得~
TIPS:
1. 記得要用中空模, 因為個麵糊好濕, 唔用中空模好易發唔起
2. 個蛋糕模千祈唔好搽油或鋪牛油紙, 因為個麵糊需要有地方俾佢黏住慢慢爬上去
北海道戚風蛋糕 15個

北海道戚風蛋糕 15個
蛋黃糊:
蛋黃……………100克
鹽……………1/4小匙
沙拉油…………40克
牛奶……………40克
香草精…………少許
低筋麵粉………50克
發粉…………1/4小匙
蛋白霜:
蛋白……………210克
塔塔粉………1/4小匙
細白砂糖………105克
做法:
1) 烤箱預熱至175℃。
2) 蛋黃加鹽攪拌,再依序把沙拉油和牛奶加入拌勻。
3) 麵粉和發粉篩入,攪拌均勻,再加香草精拌一下。
4) 蛋白和塔塔粉打起泡,分3次把糖加入,打到硬性發泡。
5) 把蛋黃和蛋白兩者輕輕拌勻,裝在擠花袋裡。
6) 平均擠在小紙杯裡,每個約35克。排在烤盤上。
7) 放烤箱中層烤約15分鐘即可出爐。放涼。
8) 鮮奶油打發。
9) 卡士達粉加冰牛奶拌勻,趁還沒硬化趕快倒入鮮奶油中打一下,打勻即可。
10) 用擠餡用的長管花嘴把餡擠進已冷卻的蛋糕裡,每個大約擠入14克(擠到蛋糕表面稍微上漲,餡也冒了一點出來就差不多了)。冷藏更美味可口。
註:
成份這麼高的配方可以不加發粉或塔塔粉,也不致於有明顯的影響。
因為戚風做法已經寫過很多篇,這裡不再詳述。如果沒有卡士達粉必需自己煮卡士達,請參考「泡芙,美天鵝」這篇食譜。
市售的這種蛋糕大多用容量約120c.c.的小方紙模烤,餡裡有加「北海道牛奶香精」,表面撒糖粉,這些在烘焙材料行都可買到。
custard
5 egg yolks
1/3 cup + 1 tbsp. granulated sugar
1 1/2 cups whole milk
3 tbsp. all-purpose flour
1 vanilla bean, split in half and scraped
Pinch of salt
For the Pastry Cream:
1. In a medium bowl, stir together 1/3 cup milk with flour, salt and whisk until smooth. Add the yolks and 3 tbsp. sugar and whisk vigorously until mixture is smooth and pale lemon in colour.
2. In a heavy bottom saucepan, heat remaining milk with the remaining 3 tbsp. sugar and vanilla scraping over medium heat. Heat until milk just comes to a boil. While stirring the yolk mixture, slowly pour 1/4 of the hot milk into the yolk mixture. This will temper the egg yolks so they don’t start to scramble. Immediately pour yolk mixture into hot milk in the saucepan. Whisk over medium heat until mixture comes to a boil and thickens. Remove from heat immediately. Cover with plastic wrap to prevent skin from forming. Cool completely.
------------------------------------
3 cups whole milk shopping list
1/3 cup sugar shopping list
1 1/2 tablespoons flour shopping list
5 egg yolks shopping list
1 teaspoon vanilla extract shopping list
How to make it
--------------------------------------------------------------------------------
Heat the milk in the top of a double boiler.
Mix the sugar and flour.
Add egg yolks and blend well.
Add the milk, stirring with a wire whisk.
Return mixture to double boiler.
Cook over simmering water, stirring constantly, until thickened.
Cool quickly by placing the bottom of the pan in cold water.
Strain.
Add vanilla.
Chill thoroughly before using.
2010年7月14日星期三
pandan chiffon 6 inch
班蘭椰香戚風蛋糕 -16.5 cm 書名 :雪芳蛋糕 作者 : 曾美子
材料:
蛋黃 3個
砂糖 35g
椰漿 50g
班蘭精 10g (我用4 塊新鮮班蘭榨汁)
沙拉油 40g (我用葡萄籽油)
椰絲 30g (如不太喜歡食椰絲可以省或減小)
椰子粉 20g
低筋麵粉 50g
泡打粉 1.5g
蛋白 120g
砂糖 45g
準備 :
1) 椰漿、沙拉油隔水加熱至(30-40度左右)
2) 將椰子粉、將粉類混合過篩 2 次,可使用前再過篩.
3) 焗爐預熱 170 度.
做法 :
1) 蛋黃打勻加入砂糖攪拌成淡黃色後.
2) 椰漿、沙拉油、班蘭精加入拌匀.
3) 用另一個盆, 把蛋白打至起泡,將糖分三次加入發打,直至蛋白豎起後有立
4) 角硬度為止.
5) 將1/3份量之蛋白放入蛋漿攪勻,下1/2份量粉類用Fold-in 形式混合,再
6) 下1/3蛋白混合,下剩餘的麵粉再混合,最再加剩下的1/3蛋白直至完全
7) 混合. ※1/3蛋白→1/2粉類→1/3蛋白→1/2粉類→1/3蛋白.
8) 將椰絲放入輕輕拌合.
9) 麵糊倒入模,用刮刀整平雙手提起模在桌上輕敲消除麵糊間空隙.
10) 170 度焗25-30 分鐘,出爐後倒扣.
----------------------
北海道牛奶蛋白戚風 chiffon
食譜來自超Q潤戚風
材料 ( 17cm模)
蛋白 200g
糖粉 70g
菜油 40cc
北海道牛奶 80cc
低筋麵粉 70g
鹽 1/8茶匙
雲呢拿耔半條或雲呢拿油5滴
做法:
1. 菜油同牛奶用打蛋器攪勻.
2.低筋麵粉過篩加入(1)仔細拌至粉狀消失成柔滑狀麵糊,再加入雲呢拿耔拌勻
3.蛋白加全部糖粉打至比基本蛋白霜稍硬身些
4.用膠刮刀輕手和動作要快將蛋白霜分3次fold in混合麵糊中,
然後倒入戚風模凳幾下後,馬上入爐。
5.以170度焗40分鐘,用竹籤刺入蛋糕內不沾黏為完成,
倒扣一晚或完全涼透後脫模
AND
請問各位BLOG友..朋友..土匪們~!
我有位朋友想買部麵包機做包包...有冇好介紹呀?
vanilla chiffon
材料:(8吋)
蛋黃 5個
砂糖 110g
沙拉油 80ml
水 80ml
低筋粉 130g
蛋白 7個
香草豆莢 1/2條
準備
1. 低筋粉過篩備用
2. 香草豆莢用刀子縱切剖開, 把籽的部份刮取出來
3. 焗爐預熱至180度
做法:
1. 蛋黃稍微打散, 加入1/3量的砂糖用打蛋器混拌均勻
2. 沙拉油分次少量地加入混合, 加水後繼續攪拌
3. 加入香草豆莢, 低筋粉混合拌勻
4. 粉塊消失, 變得光滑柔潤後, 蛋黃麵糊便完成
5. 蛋白用電動打蛋器打發泡, 全體打發泡後, 加入剩餘砂糖的一半的分量
6. 繼續攪拌, 再加入剩餘的砂糖打發泡
7. 打到可拉出尖角後, 蛋白霜便完成
8. 將1/3量的蛋白霜加入蛋黃麵糊中, 用打蛋器將全體調和般確實混拌
9. 加入剩餘的蛋白霜, 不要攪破氣泡般地快速攪拌均勻
10. 換成橡皮刮刀, 不要留有蛋白霜痕跡地從底部翻拌上來將全體混合
11. 將麵糊從稍高一點的位置一口氣倒入模型中
12. 用兩手將模型提起然後放下輕敲, 讓裡面的空氣釋出, 以預熱至180度的焗爐焗約40分鐘
13. 烘烤完成後馬上連著模型倒扣過來, 放在倒過來的杯子上冷卻
14. 冷卻後用刀子小心脫模即成
*蛋白霜打至濕性發泡就可以了
2010年7月13日星期二
柚子chiffon

食譜 ( 16.5 cm戚風模)
材料 :
A . 蛋黃 ~ 3個 / 砂糖 ~ 12g
B. 韓國柚子蜜 ~ 80g / 暖水 at 60 Degree ~ 50ml / 菜油 ~ 50g / grand marnier ~ 10g
C : 低筋粉 ~ 75g /泡打粉 ~ 1/4 teaspoon
D. 蛋白 ~ 4個 / 砂糖 ~ 30g
if egg white 5, 2.5 yolk, sugar= 4G + 46g ; flour up to 80g ,30g grand marnier , 50g water
oil 54 g, jam 95g, BAKING POWDER 1/2 TEASPOON
*beat everything at 40C
預備 :
預熱焗爐 170 度 (約10-15分鐘)
柚子蜜+暖水開勻+菜油+檸檬汁拌勻
C料混合過篩2-3次
做法 :
1. 蛋黃打散,加入砂糖攪拌成淡黃色
2.加入B料拌勻
3.加入已過篩C料拌勻
4.蛋白打至起泡後,砂糖分三次加入打至企身 speed 1 for 1 mins speed 2 for 30 sec, speed 3 for 45 sec, speed 1 until firm
5.4) 將1/3份量之蛋白放入蛋漿攪勻,下1/2份量粉類用Fold-in 形式混合,再下1/3蛋白混合,下剩餘的麵粉再混合,最再加剩下的1/3蛋白直至完全混合. ※1/3蛋白→1/2粉類→1/3蛋白→1/2粉類→1/3蛋白.
6.將麵糊倒入模內,用膠刮抺平表面,提起往桌面輕敲一下,消除麵糊間空隙
7.放入已預熱170度的焗爐焗約30-35分鐘
8.出爐後倒扣放涼
http://www.wretch.cc/blog/helenleung/5971014
伯爵茶戚風 cake
食譜參考<超Q潤戚風>
材料 ( 17c m模)
蛋黃 40g (2個)
白糖A 40g
菜油 40c c
低筋麵粉 80g
鹽 1/8小匙
紅茶茶葉 1大匙
紅茶液 80g
蛋白 160g (4個)
白糖B 30g
蛋黃醬的製作
1. 將蛋黃倒入盆中, 再加白糖A的1/3, 用打蛋器攪勻.
2. 待砂糖溶化, 加入剩餘砂糖的一半, 繼續攪勻.
3. 又待砂糖溶化, 加入剩餘的所有砂糖, 拌勻. 這時的蛋黃顏色會稍微偏白, 份量也變多.
4. 一次過加入菜油, 攪拌至融合.
5. 加入紅茶液混和均勻, 再用打蛋器以擦盆底的方式攪拌均勻.
6. 加入磨碎的茶葉, 將麵糊整體拌勻.
7. 將篩過的鹽和麵粉全部倒入盆中, 用打蛋器拌至粉狀消失為止.
8. 將麵糊拌至柔滑的狀態即可. 這時馬上接著打蛋白霜.
蛋白霜的製作
1. 蛋白打至形成粗泡, 加入白糖B的1/3量, 繼續打發至濃稠狀.
2. 加入剩餘白糖的一半, 繼續打發至手感變沉重, 再加入餘下所有白糖, 再大動作地翻攪, 至蛋白霜立起時前端微微向下低垂. 這就是制作chiffon最理想的蛋白霜狀態.
混合
1. 用打蛋器撈部份蛋白霜入蛋黃麵糊中拌勻.
2. 再撈一次蛋白霜入蛋黃麵糊中, 這次換成橡皮刮刀來攪拌.
3. 將已拌入部份蛋白霜的蛋黃麵糊一口氣倒入蛋白霜的攪拌盆中, 用橡皮刮刀快速攪拌.
4. 將攪拌好的麵糊倒入模子裏, 雙手拿著模子, 拇指壓住中心圓筒部分, 在桌上輕敲兩下, 以去除空氣.
5. 用橡皮刮刀將麵糊往模子側面沾黏, 以便烘焙過程中讓麵糊往上拉, 膨脹效果更好.
入爐
1. 將模子放入焗爐, 溫度170度, 焗40分鐘.
2. 時間一到, 用竹籤斜插蛋糕中心, 拔出竹籤沒有沾黏的話, 即完成, 否則再焗3 分鐘, 重新測試至完成為止.
脫模
1. 焗完後, 將摸子整體倒轉, 放涼.
2. 完全放涼後, 用小刀沿模子和蛋糕的邊緣慢慢上下移動一圈.
3. 用戚風刀沿著中間的圓筒繞一圈, 然後慢慢脫模.
小貼士
1.以我的經驗,一般的蛋的重量比此書的為輕。蛋黃多數是15G一個, 而蛋白多數是30-35G。 如果跟足分量可能不止用2黃4白。
2. 我又試過只以2黃4白來做。發現蛋糕的質地也很好, 但可能蛋糕的高度未能高過模具。
3. 紅茶我用了3個茶包作沖泡, 另外1個剪開將茶葉碎加入蛋黃醬中, 即共用了4個茶包。
蜂蜜蛋糕(理論編)
工具:
1. 29cmx19cmx8cm木框模一個
2. 叉燒紙或白報紙 最少4層,新手可用8層。
3. 鋁盆 35cmx25cm 2個(一個放上木框模;一個放上石春,再放在蛋糕面上定型。)
4. 溫度計
5. 石春、入爐石仔或可入爐的重物品(e.g.爐意粉專用盆、LC金屬「啲」鍋蓋。)
6. 不沾膠布或牛油紙(尺寸為四邊大過木框模2cm都可以)
7. Km010 (因為打蛋糊時的速度是跟這部型號,不同型號,有不同速度,亦會影響打湖的狀態。)
8. 焗爐 Delonghi EO3870 28L(爐溫也很重要,有的會因應不同焗爐而加大熱力或時間。)
材料:(妃娟)
a.
全蛋 540g(選用蛋黃細,蛋白多的蛋會容易打起。)
糖 200g
蜂蜜 160g(杰身的,會較難打起,初學者最好選用稀身的蜂蜜。)
b.
蛋糕乳化劑(sp) 15g
c.
中筋麵粉 300g(低筋麵粉150g+高筋麵粉150g)
d.
味霖 40g
e.
菜油 75g
牛油 50g
鮮奶 100g
步驟:(籃字是經過在家鑽研後修改)
1. 木框模舖紙,下墊8(最少4)層白紙,為保持蛋糕濕潤,烤箱內可多放一個烤盤,盤內裝1杯水。(YY沒有加水)。
2. a材料混合,隔熱水攪拌至40度,倒入攪拌缸。(直接將a材料倒入攪拌缸後,隔熱水邊攪拌邊加熱至40度。將蛋糊用KM2度打1分鐘。
3. 加入b材料用中速打10-20秒(中速KM3-4度打5-7分鐘,糊狀是打得很企身,拿起可以寫到8字為佳。),將sp打散。(亦有人打15分鐘,但我嘗試過,麵糊初期是比較企身,但最後完成也與之前做過的,沒有分別。
4. 加入c材料(一邊加入,一邊用膠刮刀大概Find-in,見到粉粒都可以,不要過份拌勻,)用中速(km 3-4度)打1分鐘(1分30秒),高速(KM5-6度)打3-4(6-8)分鐘至濃稠發白(用膠刮刀刮缸底,看看底部是否拌勻),慢速(KM1-2度)打2(3分30秒)回掉大氣泡,會見到大氣泡開始變幼細,完成似絲帶為佳,最後也可以用膠刮刀刮缸底。
5. D材料回溫至40度,用低速(KM1-2度)拌入麵糊中。
6. E材料煮至80度,慢慢加入麵糊中,慢速(KM1-2度)加入,再用1分鐘拌勻,(完成後用膠刮刀刮缸底,看看底部是否拌勻,完成所有程序,麵糊剛好蓋過攪拌掌為佳,但發現不到,也不用再打麵糊了),倒入本框模內,用膠刮刀在麵糊面畫幾下,便面的顏色平均。
7. 200度先烤15(17)分鐘上色,改160度(15分鐘,麵糊開始升起,在木框表面舖一張不沾膠布,再壓一個平均舖有石春的烤盤,可維持蛋糕面平整,繼續烤20分鐘至熟。) 35分鐘,全程約50(52)分鐘。
8. 烤30分鐘時,在木框表面上先舖一張不沾布,再壓一個烤盤烤到熟,可維持蛋糕面平整。
9. 出爐後取走石春盆及不沾膠布,立即敲一下, 使熱空氣上升,保持高度,舖回不沾膠布及放涼架,立即倒叩,5分鐘後反轉,脫除木框模,拉開四邊叉燒紙,如果可以,取走下層3張叉燒紙繼續放涼。放涼後,切去四邊修正,分成你所需要的型狀即可。
妃娟的溫馨提示:
1. sp先打散再加麵粉拌勻。
2. 一般而言,傳統蜂蜜蛋糕的配方標準糖量是麵粉的2倍,高糖量是這種蛋糕濕潤的一大原因。我已經使用大量蜂蜜替代砂糖了。而蜂蜜的甜度也只有砂糖的75%而已。
所以這裡用200g砂糖並不甜膩,不建議再減糖。糖量若太低,帶不出蜂蜜的香甜與蛋糕獨特的濕潤口感。
3. 油水一同加溫可以加強彼此乳化效果。趁熱加入麵糊中可大為提高麵糊吸濕率,這種燙麵糊的做法能使蛋糕更柔軟濕潤,這是有理論根據的。所以油水盡量在溫熱狀態倒入麵糊中,效果最好。但是加熱油必須小心,勿操之過急。否則一旦消泡,蛋糕會變成發糕。
4. 上列配方蜂蜜量太高、sp量太少,難度稍高,對新手而言是較為不利的風險,建議使用半貫以上的攪拌機攪拌,至於325w以下小馬力的機器,建議減量攪拌,否則很難做得好。
5. 新手操作請用sp含量30g以上的其他配方。
叉燒紙或白報紙的分別。
叉燒紙在烘焙店會買到,但也有朋友會選用白報紙,效果可能會好些,選用白報紙對你們來講,可能要到報紙出版社懇求取2、3張外,或想不到辦法買到,但實際上,我日日都有一卷白報紙在身邊,而選購白報紙的地方也不難找,只要你到大型文具店,向店員查詢,你想買一卷白色的紙樣紙,只是十元八塊,已經有2大張了。
http://hk.myblog.yahoo.com/jw!8hu2uS6LCQfrqILqVmOp_KI-/article?mid=50250
2010年7月12日星期一
chcoolate cut cookies
材料:
低筋面粉 200g
可可粉 30g
杏仁粉 80g
糖粉 80g
牛油 120g
蛋 1隻
鹽 少許
1) 所有粉類和鹽過篩
2) 牛油切成小粒
3) 將1)和2) 用手指搓/捽成粉狀
4) 加入蛋, 用手搓成面團, 整形, 放入雪櫃2-3小時或過一晚
5) 取出面團, 切5mm片, 印上櫻花圖案, 180度10-15分鐘即成
印圖案的方法:
在將要印圖案的位置上, 灑少許面粉
低筋面粉 200g
可可粉 30g
杏仁粉 80g
糖粉 80g
牛油 120g
蛋 1隻
鹽 少許
1) 所有粉類和鹽過篩
2) 牛油切成小粒
3) 將1)和2) 用手指搓/捽成粉狀
4) 加入蛋, 用手搓成面團, 整形, 放入雪櫃2-3小時或過一晚
5) 取出面團, 切5mm片, 印上櫻花圖案, 180度10-15分鐘即成
印圖案的方法:
在將要印圖案的位置上, 灑少許面粉
Almond chocolate cookies的抺茶味版!

這個曲奇是Almond chocolate cookies的抺茶味版!
還沾了雪糖, 好"卡娃兒"哩!
低筋面粉 100g
抺茶粉 10g
牛油 70g
糖霜 70g
蛋 20g
杏仁片 40g (這次用了50g)
雪糖 適量 (可在二得惠或各大烘焙店購買)
1) 牛油及糖打至鬆發, 加入蛋混合, 再拌入面粉及可可粉, 最後放入杏仁片
2) 放入雪櫃2小時, 取出, 整理成圓柱型, 放回雪櫃, 2小時或過夜, 沾上雪糖
3) 取出切成5mm薄片, 放入焗盤, 170度焗15分鐘
hazelnut cookies

食譜(約20件)
牛油 125g
糖 35g
榛子粉 85g
高筋粉 150g
梳打粉 1g
原粒榛子
1) 牛油加糖用中速打發
2) 加入榛子粉, 篩入高筋粉及梳打粉
3) 切拌攪勻後, 捲成圓桶型放麵糰入雪櫃至實
4) 取出切好每件厚至均衡的曲奇, 放上原粒榛子, 180c焗12mins
chef bo的食譜糖粉偏甜, 這食譜糖的份量已減一半
原食譜的榛子粉是用原粒榛子再打磨的, 應該會更香口
我沒有把麵糰捲成圓桶型, 只是碌平再用圓模印出, 效果相約
原粒榛子放上曲奇上要按得實一點, 壓到曲奇底也可以, 這樣榛子才不易甩掉~
芋頭曲奇 cookies

芋頭曲奇食譜
芋絲 (隔水蒸熟, 去皮) 80g 牛油 60g
糖粉 40g 蛋黃 1個
低筋粉 130g 泡打粉 ¼茶匙
芋頭香油 ½ 茶匙 (馬來西亞出品的)
1) 室溫牛油加糖粉拌勻, 分2次加入蛋黃, 然後加入芋頭香油拌勻
2) 篩入低筋麵粉及泡打粉, 以切伴方法將麵糰拌勻
3) 將麵糰碌成約0.5cm厚度, 然後包好, 冷藏2小時或以上
4) 取出後用印模印出曲奇, 180c, 焗20mins至金黃色
* 曲奇模可先上高筋粉, 再印上麵糰, 會較易從模中取出
rum cookies baked
材 料 : ( 份量 : 15-20 小塊 )
無鹽牛油 (室温) 225 克
糖粉 100 克
云雲呢拿香油 少許
rum extract
牛奶 20 ml
低筋粉 (篩好) 300 克
提子 (用Rum酒浸) 40 克
做 法 :
(1) 首先將焗爐預熱170度火 15分鐘及低筋粉加入糖粉(篩好)混合,備用
(2) 將室温牛油旅入缸內用打至鬆起,加入糖粉(攪拌)分2次加入打至奶白狀態
(3) 加入雲呢拿香油加入牛奶落去再攪拌勻後,再加入巳篩好低筋粉加糖粉再加入已浸提子乾去攪拌勻
(4) 用膠挖將材料拌勻成麵團後,搓成長條型用牛油紙、保鮮紙墊底把麵糰卷起壓實,放入冰箱冷藏至硬身
(5) 取出麵糰然後用大刀直切成一片片,麵糰要雪硬身先容易切
(6) 將一片片小麵糰放在預先舖了牛油紙上及放入已預先預熱焗爐內
(7) 放在焗爐內以 170 度火焗 15 - 20分鐘至金黄色,即可
rum ball cookies
Rum balls
Ingredients
1 cup semisweet chocolate chips
1/4 cup corn syrup
1/2 cup rum
2 2/3 cups crushed vanilla wafers
1/2 cup confectioners' sugar
1 cup chopped pecans
Directions
In the microwave or in a metal bowl over a pan of simmering water, melt chocolate chips, stirring frequently until smooth. Remove from heat and stir in corn syrup and rum. Combine the vanilla wafer crumbs, confectioners' sugar and pecans; stir into the chocolate mixture until well blended. Chill until firm, about 1 hour.
Roll dough into 1 inch balls. Refrigerate in an airtight container until serving. .
2010年7月8日星期四
new york time chocolate chips cookies
Chocolate Chip Cookies
Adapted from The New York Times, David Leite and Jacques Torres
Yield: 1 1/2 dozen 5-inch cookies.
2 cups minus 2 tablespoons (8 1/2 ounces) cake flour
1 2/3 cups (8 1/2 ounces) bread flour
1 1/4 teaspoons baking soda
1 1/2 teaspoons baking powder
1 1/2 teaspoons coarse salt
2 1/2 sticks (1 1/4 cups) unsalted butter
1 1/4 cups (10 ounces) light brown sugar
1 cup plus 2 tablespoons (8 ounces) granulated sugar
2 large eggs
2 teaspoons natural vanilla extract
1 1/4 pounds bittersweet chocolate disks or fèves, at least 60 percent cacao content (see note)
Sea salt
1. Sift flours, baking soda, baking powder and salt into a bowl. Set aside.
2. Using a mixer fitted with paddle attachment, cream butter and sugars together until very light, about 5 minutes. Add eggs, one at a time, mixing well after each addition. Stir in the vanilla. Reduce speed to low, add dry ingredients and mix until just combined, 5 to 10 seconds. Drop chocolate pieces in and incorporate them without breaking them. Press plastic wrap against dough and refrigerate for 24 to 36 hours. Dough may be used in batches, and can be refrigerated for up to 72 hours.
3. When ready to bake, preheat oven to 350 degrees F. Line a baking sheet with parchment paper or a nonstick baking mat. Set aside.
4. Scoop 6 3 1/2-ounce mounds of dough (about 1/3 cup) onto baking sheet, making sure to turn horizontally any chocolate pieces that are poking up; it will make for a more attractive cookie. Sprinkle lightly with sea salt and bake until golden brown but still soft, 18 to 20 minutes. Transfer sheet to a wire rack for 10 minutes, then slip cookies onto another rack to cool a bit more. Repeat with remaining dough, or reserve dough, refrigerated, for baking remaining batches the next day.
Note: Fèves, oval-shaped chocolate pieces, are usually available at Fresh Market, Whole Foods and Williams-Sonoma.
tips
1. Time matters. You should let the dough rest overnight, but a 36-hour rest is prime. That gives the dry ingredients time to fully soak up the eggs, creating a dough that’s exceptionally dry.
2. Size matters. You’ll be measuring the dough in a 1/3 measuring cup to create cookies that are about 5″ so you can enjoy all the different textures. The outside edge will be golden brown and crisp, the center will be light and soft and chewy, and between the two you’ll find a ring where those textures intertwine.
3. Salt matters. Just before you slide your dough into the oven, add a sprinkle of sea salt. That small touch will add an unexpected complexity and a little bite to a simple sweet. And if you forget the salt on a tray of these cookies, you will know. Trust me.
From all of the chefs’ suggestions and his own research, Leite adapted Jacques Torres’ classic chocolate chip cookie recipe and created what’s known as the “New York Times Chocolate Chip Cookie.” The recipe is dead simple and takes little “active” time, but the results are so predictably perfect, I’ve given away tins as gifts.
2010年7月7日星期三
chocolate mochi
The recipe.........
The Ganache.....
250 gm chocolate
1/2 cup of heavy or double cream
2 T unsalted butter
2 T rum (optional) I did not use this
1 tsp vanilla extract
1/2 cocoa for dusting
The mochi dough............
1 cup mochi or glutinous rice flour or pulut
1/4 cup raw sugar or white sugar (I used white)
2/3 cup water (Iused 1/2 cup) dependingon your flour quality
Strawberry Daifuku
- 10 small strawberries, about 10 grams (1/3 ounce) each (if your strawberries are large, you can cut them in half)
- 100 to 120 grams (3 1/2 to 4 1/4 ounces) anko* (sweetened azuki bean paste: koshian is smooth, tsubuan is chunky)
- 100 grams (3 1/2 ounces) shiratamako* (glutinous rice flour; comes in granules)
- 50 grams (1/4 cup) sugar
- 150 ml (2/3 cup) cold water
- plenty of katakuriko* (potato starch) for dusting (corn starch can be substituted)
Makes 10 ichigo daifuku. The recipe can be doubled, but these daifuku taste best on the day they're made, so don't make more than you can eat within a day or so.
Rinse, dry, and hull the strawberries. Coat each strawberry with about 2 teaspoons red bean paste. Place the coated strawberries on a plate and reserve in the fridge.
If you have a microwave: combine the rice flour, sugar, and water in a plastic or glass bowl, and stir to dissolve. Cook for 2 minutes in the microwave on medium, stir with a silicone spatula, and repeat once or twice, until the mixture is thick and slightly translucent.
If you have a rice cooker: combine the rice flour, sugar, and water in the bowl of the rice cooker, and stir to dissolve. Cook for 10 to 12 minutes, stiring once or twice during that time with a silicone spatula, until the mixture is thick and slightly translucent.
If you have a steamer: combine the rice flour, sugar, and water in a heatproof bowl that fits inside your steamer, and stir to dissolve. Place the bowl in the steamer and cover the bowl with a heatproof plate or cover. Close the steamer and cook for 10 to 12 minutes, stiring once or twice during that time with a silicone spatula, until the mixture is thick and slightly translucent.
While the rice flour mixture is cooking, pour a generous layer of potato starch in a rimmed baking sheet, and keep more potato starch on hand. When the rice flour mixture is ready, pour it onto the prepared baking sheet; it will be super sticky. Sprinkle generously with more potato starch, pat the dough to flatten it slightly (caution: it will still be rather hot), and use a pastry cutter/scraper or a knife to cut it into 10 even pieces, square or triangular.
Remove the coated strawberries from the fridge. Take one piece of dough, stretch it gently so it will be large enough to envelop a strawberry, and place it on the palm of your hand. Dust the starch off the top surface with a pastry brush, place a coated strawberry in the center, tip side down, and wrap the dough around it, twisting the edges gently to seal into a pouch, and making sure the dough doesn't tear.
Place the daifuku seam side down on a plate dusted with potato starch, and repeat with the rest of the ingredients. The dough will get less flexible as it cools, so try to work at a brisk pace. Save the unused potato starch in a container to use again next time.
Let rest for an hour to set and cool to room temperature before serving. Leftovers should be covered and stored at room temperature, but note that strawberry daifuku taste best on the day they're made, so don't make more than you plan to eat within a day or so.
(Take a look at this video for a demo
柱 侯 牛 - dish
牛 坑 腩 700 克
牛 白 腩 700 克
牛 筋 450 克
薑 50 克 , 拍 扁
蒜 2 瓣 , 拍 扁
青 2 棵
果 皮 1 角 , 浸 軟
羅 漢 果 1/4 個
油 1 湯 匙
燜 牛 腩 醬 料
柱 侯 醬 2 湯 匙
糖 2 湯 匙
紹 酒 1/4 杯
頭 抽 2 茶 匙
鹽 少 許
預 備
1. 牛 腩 洗 淨 , 整 塊 放 入 大 鍋 中 , 加 水 過 面 (1) , 大 火 燒 至 水 開 , 繼 續 用 中 火 煮 牛 腩 至 脫 生 , 移 出 在 水 下 沖 去 積 血 (2) 。
2. 將 牛 腩 放 回 鍋 內 , 加 入 一 半 拍 扁 的 薑 、 蒜 和 果 皮 (3) , 加 水 蓋 面 , 煮 至 水 開 時 撇 去 湯 面 上 的 浮 泡 (4) , 加 蓋 以 中 火 煮 1 小 時 , 關 火 焗 1/2 小 時 (5) 。
3. 再 用 大 火 將 鍋 內 的 牛 腩 燒 開 , 加 蓋 用 中 火 煮 1 小 時 , 焗 1/2 小 時 。
4. 移 出 牛 腩 , 稍 擱 涼 後 片 去 可 見 脂 肪 (6) , 下 刀 切 成 大 塊 , 約 4 厘 米 丁 方 塊 (7) 。 是 時 取 出 牛 腩 湯 3 杯 留 他 日 之 用 。
5. 焗 牛 腩 時 可 用 另 一 小 鍋 煮 加 水 和 薑 一 塊 煮 牛 筋 (8) , 如 法 汆 水 、 去 硬 骨 (9) , 洗 淨 , 中 火 煮 牛 筋 至 半 軟 , 約 需 1 1/2 小 時 , 切 4 厘 米 長 段 (10) 。
6. 將 鍋 中 之 湯 濾 清 , 撇 去 浮 油 , 留 用 。
燜 法
置 中 式 鑊 於 中 火 上 , 下 油 1 湯 匙 , 先 爆 香 餘 下 薑 塊 , 加 入 柱 侯 醬 和 糖 (11) , 炒 至 糖 溶 , 將 牛 腩 件 放 下 鑊 內 炒 透 兜 勻 , 灒 酒 , 下 頭 抽 , 再 加 入 牛 腩 湯 蓋 過 面 (12) , 下 羅 漢 果 燜 約 1/2 小 時 後 下 牛 筋 同 燜 , 至 全 部 腍 軟 , 略 收 汁 (13) , 試 味 , 不 夠 味 可 酌 量 加 鹽 , 便 可 供 食 。
清湯腩 -dish
材料 Ingredients
1- 上等牛坑腩1 磅半 50%坑腩,50%崩沙腩
2- 芫茜2 棵切粒
3- 薑片4 塊
5- 青蔥 3 條, 去白, 切段
6- 白蘿蔔500克, 去皮切件
汁料 Sauce
1- 金寶牛清湯1 罐
2- 紹酒1 湯匙
3- 冰糖1 湯匙
薑數片、蒜蓉2茶匙、乾蔥蓉2茶匙、八角 1 粒、果皮 1小片
、冬菜少許、唐芹、
1- 先將牛腩飛水約10 分鐘, 用凍水洗淨, 將牛腩放於煲內, 加入薑片, 青蔥, 注入清水至蓋過牛腩, 大火煲滾, 加入冰糖, 蓋頂大火煲10 分鐘, 熄火, 蓋頂焗30 分鐘, 再蓋頂大火煲10 分鐘, 熄火, 蓋頂焗30 分鐘, 再蓋頂大火煲10 分鐘, 熄火, 蓋頂焗30 分鐘, 隔水, 牛腩留於煲內備用
2- 於另一個煲內牛清湯和4 杯清水(900ml)煲滾, 取1 碗牛清湯放入裝放牛腩的煲內, 加1 湯匙鹽和紹酒, 蓋頂煮滾, 熄火蓋頂, 把它放於一旁備用 (圖2)
3- 將白蘿蔔, 芫茜粒(葉留用), 冬菜放入牛清湯煲內, 中火蓋頂炆30 分鐘或至白蘿蔔變腍(圖1), 將湯調好味, 再將牛腩取出切薄片, 再放回裝放牛清湯煲內蓋頂大火滾2 分鐘, 再灑上芫茜葉即成
貼士 Tips
1- 要再好味啲, 當然自己整牛清湯最好, 不過則要用很多時間, 有高壓煲的話, 則不需煲10 分鐘焗30 分鐘, 直接將加入薑片, 青蔥, 冰糖和水, 將牛腩高速炆腩即可
2- 浸牛腩的湯是特別鹹的, 目的時要令牛腩更有味道, 而主湯底要最後先調味, 太早調味會令湯過鹹
3- 按這裡查看 "有關烹調術語" 的解釋
Tiramisu cake from leisure cat

材料(八至十人份量)
Mascarpone Cheese 500 克
蛋黃 3 隻
蛋白 3 隻
細砂糖 5 湯匙
手指餅 (Lady fingers) 12 條
濃黑咖啡 (室溫espresso) 1 杯
Aramatto 酒 (意大利杏仁酒) 5 茶匙
雲呢拿香油 1茶匙
冇糖可可粉 適量
用具
5 X 10 X 3吋長形蛋糕模
製作過程
1. 先準備濃黑咖啡,待涼。蛋白打至企身,備用。
2. 蛋黃加砂糖用電動打蛋器打至忌廉狀,拌入Mascarpone 芝士混合,加雲呢拿香油攪勻。將蛋白伴入芝士混合物。
3. 將咖啡和Aramatto 料混合在容器內,將一半份量的手指餅獨一條一條快快放在容器內沾上咖啡液,舖平在蛋糕模底。
4. 將一半芝士料倒入;再舖上另一半手指餅,重複掃上咖啡糖漿,倒入餘下所有芝士料舖平,放入雪柜至凝固,吃前最後洒上可可粉即成。
貼士
1. Mascarpone Cheese、手指餅和意大利Aramatto杏仁酒,可在City Super 買。
2. 可用4茶匙Rum酒1茶匙杏仁香油代替Aramatto杏仁酒。
3. 如果你是新手,手腳慢,阿貓建議你最好用掃,掃咖啡液上手指餅,否則容易弄得太濕。
燒乳豬
燒乳豬(醃法,需時2天)
材料: 乳豬
調味: 粗鹽(2茶匙),五香粉,紹酒
竅門:
1.抹乾豬,用單針刺內外皮肉。醃料搽勻全身,用保鮮紙密封,放入雪櫃醃2日。
2.焗之前,抹乾豬,搽白米醋在皮上,再用單針刺表面皮肉。
3.焗爐開至250度,預熱。豬放在架上,架下面要放一個盤水接著豬油,焗1小時,期間不斷加水。
4.1小時後,將火調至180度,焗1小時,期間不斷加水。
5.再1小時後,不加水焗15分鐘。
6.取出乳豬,再用錫紙蓋著10分鐘。
食譜:蕃茄蛋餃
做法:
1.搓好餃子皮。
2.將已調味的蕃茄粒、蛋片、芫茜放到餃子皮中間。
3.將餃子皮合上,先捏餃子頂部中間位置,再搓捏兩邊,餃子便成形了。
購物: 良記食品公司
地點: 良記食品公司
地址: 油麻地炮台街十六號地下
電話: 2384 0360
實用資訊: 燒乳豬
Caramel Truffle CHOCOLATE
Caramel Truffle (~20pcs)
牛奶朱古力 (50g),黑朱古力 (25g),細砂糖 (37g),淡忌廉 (50g),無鹽牛油 (室溫/37g)
1. 牛奶朱古力及黑朱古力切碎,隔熱水座溶。
2. 細砂糖加熱煮成焦糖,慢慢加入已煮滾的淡忌廉,攪拌至順滑,加入牛油混合,過濾。
3. 將(2)分兩次加入(1),攪勻。
4. 將(3)入雪櫃冷凍至可唧出的硬度,在牛油紙上平均唧出約20粒,再入雪櫃雪一小時。
5. 用手將雪硬了的軟心輕輕搓成圓球,滾上已調溫黑朱古力 (份量外),在網架上翻滾出花紋/滾上無糖朱古力粉/糖份。
牛奶朱古力 (50g),黑朱古力 (25g),細砂糖 (37g),淡忌廉 (50g),無鹽牛油 (室溫/37g)
1. 牛奶朱古力及黑朱古力切碎,隔熱水座溶。
2. 細砂糖加熱煮成焦糖,慢慢加入已煮滾的淡忌廉,攪拌至順滑,加入牛油混合,過濾。
3. 將(2)分兩次加入(1),攪勻。
4. 將(3)入雪櫃冷凍至可唧出的硬度,在牛油紙上平均唧出約20粒,再入雪櫃雪一小時。
5. 用手將雪硬了的軟心輕輕搓成圓球,滾上已調溫黑朱古力 (份量外),在網架上翻滾出花紋/滾上無糖朱古力粉/糖份。
fruit truffle chocolate filling
ingredients:
100g 白巧克力、
25g 淡忌廉、
15g 白櫻桃酒/ 橙酒、
15g 牛油、
25g 草莓乾、
1/2 tbsp 草莓香油
method:
(1) 先將白巧克力及淡忌廉隔水加熱至溶。
(2) 將白櫻桃酒/ 橙酒、牛油、草莓乾及草莓香油混入已溶巧克力漿內。mix well。
(3) 放入fridge 冷凍1小時。
(4) 用小刀將已凝固巧克力分成數粒。搓圓。
(5) 沾上可可粉/糖霜。
100g 白巧克力、
25g 淡忌廉、
15g 白櫻桃酒/ 橙酒、
15g 牛油、
25g 草莓乾、
1/2 tbsp 草莓香油
method:
(1) 先將白巧克力及淡忌廉隔水加熱至溶。
(2) 將白櫻桃酒/ 橙酒、牛油、草莓乾及草莓香油混入已溶巧克力漿內。mix well。
(3) 放入fridge 冷凍1小時。
(4) 用小刀將已凝固巧克力分成數粒。搓圓。
(5) 沾上可可粉/糖霜。
plain chocolate tuffle filling
•牛奶朱古力........210g
•淡忌廉...............80mL
•香草香油...........少許
牛奶朱古力.......60g
淡忌廉............40g
dark
Chocolate Truffles (yields about 32 to 36 truffles)
1 lb. (455 g) dark chocolate cut into small pieces pour onto chocolate wait 5 min. stir until smooth chill form into balls dust
1 cup (235 mL) heavy whipping cream scald
cocoa powder
Type of Chocolate Tempering Temperature
Dark (no milk content) 88-90°F (31-32°C)
Milk 86-88°F (30-31°C)
White 80-82°F (27-28°C)
2010年7月6日星期二
Chocolate Cookies crunchy
Chocolate Cookies
Butter 100 g
Sugar 45 g
Brown Sugar 45 g
Egg 20 g
Flour 135 g
Cocoa Powder 18 g
Chocolate Chips 60 g
Baking Soda ¼ Tsp
Method:
Shift the flour, baking soda with cocoa powder
Blend the butter with sugar
Add egg once at a time until fluffy
Fold in the flour mixture and fold in chocolate chips
Rub the dough into a 10 g ball and press with your thumb
Bake in a 170℃ preheated oven for about 12 mins until golden
Approx. 42 Pcs
Chips Ahoy
Chips Ahoy Cookies Close Clone Recipe
4 cup All-Purpose Flour
1 tsp Baking soda (level)
2 tsp Salt (level)
1 cup Light Brown Sugar (packed)
1 cup Granulated Sugar
1 1/2 cup Vegetable Shortening (Crisco)
1 1/2 tsp Vanilla Extract
1 large Egg White
2-4 tbsp Water (warm)
12 oz Mini Semi-Sweet Chocolate Chips
Bring all ingredients to room temperature. Preheat oven to 325 °F. Mix
the flour and baking soda in a bowl and set aside. Use an electric mixer
to mix the two sugars and shortening. When creamy add the vanilla, salt,
and egg white. Add the flour 1/2 cup at a time adding a tablespoon of warm
water as necessary to mix the flour - don't exceed 4 tablespoons of water
- this will make a firm dough. Mix in chocolate chips. As the dough gets
thicker you may want to mix by hand and abandon the electric mixer.
Roll into 2 inch balls and press down with the palm of the hand to make
flat. Bake 12-15 minutes or until golden brown.
earl grey tea chocolate filling
百爵茶朱古力餡
材料︰
淡忌廉 90克
黑朱古力粒 100克
百爵茶茶包 兩個
做法:
1. 黑朱古力坐於熱水中待熔。
2. 鮮忌廉煮熱,放入茶包,略煮至出煙。
3. 熄火,蓋上錫紙焗至茶包出味。拿出茶包。
4. 將茶味淡忌廉倒入朱古力漿中拌勻。
5. 放入唧袋備用。
材料︰
淡忌廉 90克
黑朱古力粒 100克
百爵茶茶包 兩個
做法:
1. 黑朱古力坐於熱水中待熔。
2. 鮮忌廉煮熱,放入茶包,略煮至出煙。
3. 熄火,蓋上錫紙焗至茶包出味。拿出茶包。
4. 將茶味淡忌廉倒入朱古力漿中拌勻。
5. 放入唧袋備用。
coffee chocolate
軟心咖啡朱古力
成份:
淡忌廉 40克
即溶咖啡粉 2克
黑朱古力 55%-60% 50克
牛油(已放軟) 10克
咖啡酒 5克
步驟:
朱古力殼做法:
將黑朱古力切碎(預留2、3塊待用),放在鋼器具中,於熱水上座溶,控制水溫至60-70℃。
溶化後調低火力至50-55℃,立即將整盤朱古力取離熱水。
將2、3塊黑朱古力放入朱古力溶液中,攪拌至27-28℃。
取出盤中未溶的黑朱古力,整盤再座於熱水至31℃。
把黑朱古力倒入朱古力模中,用匙羹在每格輕輕轉一圈,使空氣溢出。
反轉朱古力模倒去過量的黑朱古力,用抹刀快速刮平,再將朱古力模反轉放在紙上5-10分鐘便成。
朱古力軟心做法:
將淡忌廉煮滾至起泡,加入即溶咖啡粉拌勻。
撞入黑朱古力1分鐘後攪勻,拌入軟牛油,最後加咖啡酒拌勻放入唧袋,唧入已冷卻的朱古力殼中。10分鐘後,待軟心朱古力凝固,再將盤中的黑朱古力加熱至31℃,倒在模中,用抹刀快速刮平,放入雪櫃20分鐘即成。
bailey chocolate
食譜: 可做20粒
黑朱古力 120g (面用)
餡:
黑朱古力 40g
淡忌廉 24g
Baileys (百利甜油) 12g
做法:
1.隔熱水坐溶120g黑朱古力.
2.塗上坐溶的朱古力. (我用毛筆),放入雪柜雪5分鐘.
3.取出看是否凝固, 要待面凝固才可塗上第2層,可以比第1次薄dd..今次雪3分鐘ok.
4.取出再重覆1次. 合共3次.
5.淡忌廉加熱到微出煙.
6.加入朱古力.拌勻.*稍放涼溫度下降,才可加入酒類.
7.將餡放入唧花袋.唧入模中8成滿.
8.用坐溶的朱古力漿填滿膠模.
9.放入雪柜雪15分鐘,取出脫模.
脫模的朱古力可放入樽,再擺放涼的地方 ,得閒食兩粒.
我喜愛食凍凍地的,就存放在雪柜.
因為 雪凍ge朱古力個軟心比較黏稠,仲好食呀!
2010年7月4日星期日
CHOCOLATE CHIP COOKIES
.JPG)
INGREDIENTS:
1 1/2 cups unbleached all-purpose flour
1/4 teaspoon table salt
3/4 teaspoon baking soda
8 tablespoons unsalted butter (1 stick), melted and cooled
1/2 cup granulated sugar
1/3 cup packed light brown sugar
3 tablespoons light corn syrup
1 large egg yolk
2 tablespoons milk
1 tablespoon vanilla extract
3/4 cup semisweet chocolate chips
DIRECTIONS:
1. Adjust oven rack to middle position and heat oven to 375 degrees. Line 2 baking sheets with parchment paper; set aside. Sift flour, salt, and baking soda onto large sheet of parchment paper; set aside.
2. In bowl of standing mixer fitted with paddle attachment, beat melted butter, granulated sugar, brown sugar, and corn syrup at low speed until thoroughly blended, about 1 minute. Add yolk, milk, and vanilla; mix until fully incorporated and smooth, about 1 minute, scraping bottom and sides of bowl with rubber spatula as necessary. With mixer running on low speed, fold up 3 edges of parchment around dry ingredients to form a pouch (see illustrations below) and slowly shake dry ingredients into bowl; mix on low speed until just combined, about 2 minutes. Do not overbeat. Add chips and mix on low speed until distributed evenly throughout batter, about 5 seconds.
3. Leaving about 2 inches between each ball, scoop dough onto parchment-lined baking sheets with 1 1/4-inch (1 tablespoon capacity) ice cream scoop. Bake 1 sheet at a time, until cookies are deep golden brown and flat, about 12 minutes.
4. Cool cookies on baking sheet 3 minutes. Using wide metal spatula, transfer cookies to wire rack and let sit until crisped and cooled to room temperature. (Can be stored in airtight container for up to 1 week.)
chinese noodles 麵條
材料 : (2個人份量)
低粉 200g
高粉 100g
鹽 2.5tsp
水 1/2 cup
做法:
1.暖水加鹽先攪勻, 慢慢加入粉中混合
2.把面團搓至光滑不黏手 (見圖一)
圖一
3.用濕布蓋好置一小時
4.以手掌按壓約5分鐘
put in the machine for 3 times
5.再將麵團搓至軟硬適中, 待20分鐘 (見圖二)
圖二
6.以面棍捍平(見圖三)
圖三
7.上下向中間疊, 切成面條(見圖四)
8.用手輕拉麵條即成
圖四
9.用熱水煮至半熟 12 mins, 用冰水過冷河備用
10.煮好湯底, 加入其他配料煮至湯滾,加入麵條,
湯再大滾後, 略煮1-2分鐘即成!!
低粉 200g
高粉 100g
鹽 2.5tsp
水 1/2 cup
做法:
1.暖水加鹽先攪勻, 慢慢加入粉中混合
2.把面團搓至光滑不黏手 (見圖一)
圖一
3.用濕布蓋好置一小時
4.以手掌按壓約5分鐘
put in the machine for 3 times
5.再將麵團搓至軟硬適中, 待20分鐘 (見圖二)
圖二
6.以面棍捍平(見圖三)
圖三
7.上下向中間疊, 切成面條(見圖四)
8.用手輕拉麵條即成
圖四
9.用熱水煮至半熟 12 mins, 用冰水過冷河備用
10.煮好湯底, 加入其他配料煮至湯滾,加入麵條,
湯再大滾後, 略煮1-2分鐘即成!!
鳳梨餡

鳳梨餡 (約可做出8g x 12個餡):
罐頭鳳梨 1罐 (567g, 沒糖水那款)
砂糖 3湯匙 (這糖份量出來的味道有點酸酸甜甜, 想甜蜜一點, 可加至4湯匙)
麥芽糖 1湯匙 (如想焗出來的餡料不會乾乾的, 像樹皮, 這材料不可缺)
玉桂粉 少許
1) 罐頭鳳梨隔去水份, 用叉子壓成一絲絲, 輕輕搾去水份(此時約只餘下150g重量的鳳梨), 放入煲內
2) 將其餘所有材料加入1)中, 以中小火炒至乾身, 只須15分鐘左右
3) 放涼後, 約有成品90-100g, 然後分成每個8g的餡料
鳳梨卷皮 (約可卷24個餡, 如不想浪費皮料, 可卷兩層, 否則多做一份餡)
低筋面粉 80g
粟粉 30g
糖粉 15g
牛油 60g
蛋黃 10g
1) 牛油及糖粉打發至蓬鬆, 加入蛋黃混合, 篩入粉類, 拌至不見粉狀物即可
2) 放入雪櫃2小時, 取出
3) 將適量的2)放入模內, 擠出5-6cm的長度, 包入一個鳳梨餡
4) 如做兩層皮, 將2)擠至10-12cm長, 同樣包入一個鳳梨餡
5) 170度焗15-20分鐘
朱古力雪球 Chocolate Snowballs cookies

材料: (約32粒份量)
無鹽牛油 100g
鹽 1/5茶匙
咖啡酒 3g
糖粉 40g was 50
杏仁粉 70g
低筋麵粉 90g
粟粉 50g
夏威夷果仁 55g
Godiva黑朱古力粉 20g
製法:
將杏仁粉攤開在已墊上牛油紙的焗盤上,放入已預熱160度的焗爐,焗5分鐘,取出放涼待用。
牛油放室溫軟化後,加入鹽和糖粉,至攪拌均勻。
接著篩入杏仁粉,拌勻。
將麵粉、粟粉及朱古力粉篩入牛油混合物中,用橡皮刀拌成麵糰後放入雪櫃雪1小時,方便定型。
將麵糰分成10g一粒,搓圓後,放在已墊上牛油紙的焗盤上,放入已預熱170度的焗爐,焗15分鐘。
出爐後,趁熱滾上一層糖粉,待涼後,再上一次糖粉,即完成這款鬆脆無比的《朱古力雪球》。
注意:
用焗過的杏仁粉做曲奇,焗好的曲奇就會帶有濃濃的烤杏仁香氣。
上糖粉時,可以 把糖粉先裝入食物袋中 ,然後輕手放入雪球, 再輕輕搖動食物袋,即可輕易沾上糖粉。
由於材料中加入了粟粉,故麵糰只需放雪櫃雪一小時即可。
材料: (約22個份量)
無鹽牛油 100g (置室溫回軟)
糖粉 30g
鹽 1g
咖啡酒 3g (或以呍呢嗱香油代替)
低筋麵粉 130g
可可粉 20g
夏威夷果仁 55g
糖霜 適量
2010年7月3日星期六
cookies gift set idea
mocha cookie + sprinkles
butter soft
lemon poppyseed
earl grey tea
green tea
chocolate chips cookies + chocolate
butter soft
lemon poppyseed
earl grey tea
green tea
chocolate chips cookies + chocolate
2010年7月2日星期五
Chocolate Rice Crispies cookies

Makes about 44 golf-size (1.68-inch – I checked on the internet :) balls
Ingredients:
8 tbsp (4 oz, 120 g) unsalted butter
1/3 cup (32 g) Dutch-processed cocoa powder
Two 10-oz bags (565g) mini marshmallows
10 cups (300 g) crisp rice cereal
¾ cup (150 g) semisweet mini chocolate chips
Preparations:
Combine the butter and cocoa powder in a large saucepan over medium-high heat. Let the butter melt, and stir so that the mixture is well combined. Add the marshmallows and let them melt completely.
Remove the pan from the heat and stir in the rice cereal. When it is well coated in the marshmallow mixture, stir in half the chocolate chips. Let the mixture cool for about 5 minutes, then stir in the remaining chocolate chips. Let cool to room temperature.
Oil your hands, and shape some of the cereal mixture into a ball the size of a golf ball (1.68-inch, to be exact). Using an ice cream scoop for measuring helps to achieve the uniform size of the balls. Place the ball on a baking sheet, and repeat with the remaining mixture. Let the balls set, then store them in an air-tight container in a dry, cool environment for up to 3 days. Do not refrigerate them, or they will harden.
Vanilla Pizzelle cookies

Ingredients:
1 ¾ cup all-purpose flour
1/8 tsp salt
2 tsp baking powder
3 large eggs
1 large egg yolk
¾ cup sugar
1 tsp pure vanilla extract
8 tbsp (1 stick) unsalted butter, melted
Preparation:
In a bowl, combine the flour, salt, and baking powder; stir to combine.
In another bowl, whisk the eggs and yolk. Gradually, whisk in the sugar, then the vanilla and melted butter. Using a rubber spatula, fold in the flour mixture. Set the batter aside while you heat a pizzelle iron. I use VillaWare Prego Nonstick Pizzelle Baker.
After the iron has been heating for a few minutes, open the cover and spray the top and bottom of the imprints with oil. Close the iron to finish heating.
Drop a scant tbsp of the batter just a bit further of the center of each imprint, close the cover, and bake the pizzele until the steam stops coming out from between the plates.
You can peek without ruining them – if they are too pale, close the iron and bake longer.
Transfer baked pizzele to a wire rack to cool. Repeat the process, there’s no need to grease the iron again. Store the cooled cookies between sheets of parchment paper in an air-tight container.
Café Volcano Cookies

Makes about 36
Ingredients:
1 cup toasted almonds, coarsely chopped
1 cup toasted walnuts, coarsely chopped
2 large egg whites
1 cup sugar
2 tsp instant espresso powder (or 3 tsp instant coffee granules)
Preparation:
Position the racks to divide the oven into thirds and preheat the oven to 350 F. Line two large baking sheets with parchment or silicone mats.
Put all the ingredients, including the nuts, in a medium heavy-bottomed saucepan. Set it over medium heat and stir constantly with a wooden spoon until the ingredients are just warm to the touch. Remove from the heat.
Drop the batter by scant tablespoons onto the baking sheets, leaving about an inch of space between the mounds.
Bake the cookies for 18-20 minutes, rotating the pans from top to bottom and front to back at the midway point. When properly baked, the cookies will be puffed, cratered, shiny and dry. Remove the cookies from the oven and let them remain on the sheets for 5 minutes before gently prying them from the liners and transferring them to racks to cool to room temperature.
The cookies can be kept for about 3 days in an air-tight container. As with all meringues, humidity will make them soggy and sticky.
The recipe belongs to Dorie Greenspan.
Rose Madeleines cookies:

Rose Madeleines:
- 1/2 cup of unsalted butter (melted and cooled)
- 1/4 cup of white sugar
- 1/4 teaspoon salt
- 2 eggs
- 3/4 cup all-purpose flour + 1 tablespoon
- 1/4 teaspoon lemon zest
- 3 tablespoons rose syrup
- Madeleine molded baking tray.
Makes about 24 madeleines
Whisk the eggs, sugar and salt in bowl very well for about 5 minutes.
Hold a strainer over the bowl and sprinkle in the flour, fold this in with a spatula.
Then add the melted butter, fold this in until the batter is evenly mixed.
Add to this the lemon zest and the rose syrup
Mix it all together and you should be left with a thick, pink batter.
Cover this with plastic wrap and place in the fridge for 1 hour.
After 1 hour, take the bowl out of the fridge and leave it to sit out for 30 minutes.
(try not to exceed the 30 minutes as the batter should stay quite set.)
Preheat the oven to 400F
Add one heaped teaspoon of batter to each madeleine mold.
Don't worry about it filling the whole shell up, it will do this by itself with the heat of the oven.
Bake these on the middle shelf of the oven at 400F for about 5-7 minutes.
Lemon Poppyseed Crisps cookies
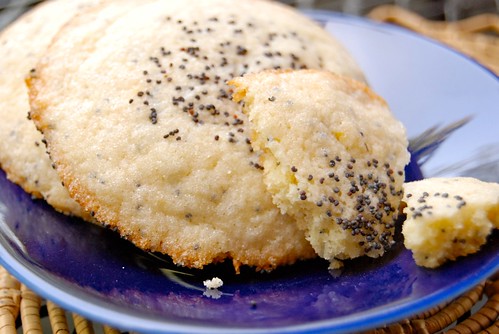
Lemon Poppyseed Crisps
Ingredients
3/4 cup butter
1 cup white sugar
1 egg
2 tablespoons corn syrup
I used a tsp. of fresh lemon juice, and a tbs. of lemon zest
2 cups all-purpose flour
1 teaspoon baking soda
1 teaspoon baking powder
powdered sugar for dusting
Directions
In a medium bowl, cream together butter and 1 cup sugar until light and fluffy. Beat in egg, corn syrup, and lemon extract. Stir in flour, baking soda, and baking powder. Cover dough, and chill in the refrigerator at least 1 hour.
Preheat oven to 325 degrees F (165 degrees C). Line a cookie sheet with parchment paper. Roll chilled dough into walnut sized balls.
Bake 12 minutes in the preheated oven, or until lightly browned.
dust the cooled cookies with powdered sugar.
Winnie手藝﹕檸檬罌粟子曲奇
●材料
牛油120克
糖霜50克
黃砂糖50克
麵粉200克
罌粟子2湯匙
檸檬皮蓉2茶匙
●做法
(1)牛油、糖霜、黃砂糖一同打至忌廉狀。
(2)加入麵粉、罌粟子、檸檬皮蓉,拌勻成粉糰。
(3)將粉糰分成兩份,搓至約三厘米的圓條,用牛油紙包好放入冰箱雪硬,後取出切成約半厘米厚的圓塊,放於已墊紙的焗盆上。
(4)將曲奇放入預熱焗爐,以攝氏180℃焗約18分鐘即成。
2010年7月1日星期四
自製"Al Dente"意大利粉
1.5 cups 00麵粉 0.5 cups of Semolina , 1 large egg yolk, 3 large whole eggs and 2 tablespoons olive oil. every 100G of flour = 1 egg
述所有材料放入mixing bowl。(有人話要將麵粉放喺平面,挖一個"井"來放入濕材料..
2. 先用麵糰膠刮將(1)的材料略略拌勻,然後改用手搓合成麵糰。
3. 乾淨平面灑上麵粉,麵糰放在平面上搓揉至光滑無粒; 一邊搓要一邊逐少加入少量水份,注意麵糰唔可以太乾或有裂痕,直至麵糰光滑如BB仔皮膚,大約需時8至10分鐘。
4. 將搓好的麵糰放入密封三文治袋,讓麵糰鬆弛30分鐘。
5. 取出麵糰大概分成2至3份; 用手將麵糰壓扁,在麵糰兩面灑上少許麵粉防黏。
6. 同樣在意粉壓麵機滾軸部份灑上少許麵粉,並將厚度setting 轉去"1",放入(5)的麵糰先壓一次。
7. 壓完一次的麵糰薄片會呈不規則"牛脷形"。
8. 將麵糰薄片頭尾摺向中間,放入壓麵機再壓一次後,讓形狀較為平均。
9. 將壓麵機厚度setting 轉去"2"壓一次; 再轉去"3"壓一次......如此類推~ 直至麵糰薄片壓至所需厚度。
P.S. 注意步驟(9)一定要go through 每一個號數 - 號數越大越薄~ 作用為增加意粉長度 + 加強口感!
- 煮滾一鍋水,加入海鹽,放入風乾好的意粉煮3至4分鐘即熟;
- 若不立即煮食,可將麵條放在雪櫃普通格保存2-3日;
- 另可將做好的麵條放入雪櫃雪至完全微微硬身,再放入三文治袋內密封,儲存在冰格;
*不過要注意因為semolina 較難受水,所以搓時加入溫水既份量亦要較多; 而且麵糰較硬,搓揉時間亦較耐少少~
Fresh pasta cooks in 2 to 4 minutes, depending on the shape; always taste before you drain. Ravioli is done when it rises to the surface. All pasta needs plenty of water, between 4 and 6 quarts for every pound of pasta, and salt, at least 1 tablespoon. Giovanna Tornabene says that pasta water should taste like a broth, so she and Bastianich use sea salt, which is more flavorful.
Jacques Torres's Mudslide Cookies
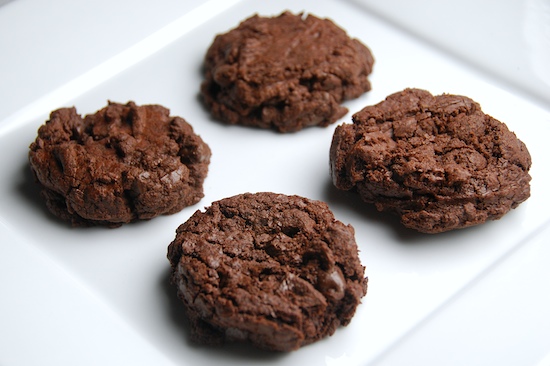
Jacques Torres's Mudslide Cookies
6 ounces unsweetened chocolate
16 ounces bittersweet chocolate
6 tablespoons butter
2 1/4 cups plus 1 tablespoon sugar
5 eggs
1/2 cup plus 3 tablespoons all-purpose flour
1 tablespoon baking powder
Pinch salt
1 1/4 cups plus 1 tablespoon walnuts, chopped
16 ounces bittersweet chocolate, chopped
Melt the unsweetened and bittersweet chocolates together and set aside.
Place the butter and sugar in the bowl of a stand mixer and mix until combined. Add the eggs 1 at a time. Add in the flour, baking powder and salt and mix just until combined. Add the melted chocolate. Stir in the walnuts and chopped chocolate pieces.
Spoon small mounds of the dough onto a parchment paper lined baking sheet. If you want to make giant cookies, use an ice cream scoop instead. Space the dough mounds evenly and bake in a preheated 350 degrees F convection oven for 13 – 16 minutes.
【伯爵曲奇】earl grey cookies

【伯爵曲奇】
材料:
伯爵紅茶 1包
牛奶 1湯匙
無鹽牛油 70g
糖粉 30g
低筋麵粉 120g
鹽 少許
梳打粉 少許
做法:
(1) 紅茶包剪開,茶碎加牛奶浸泡約30mins
(2) 室溫牛油加糖粉用打蛋器打至均勻,加入(1)的茶葉
(3) 篩入低筋粉、梳打粉,用刮刀切伴
(4) 做好的麵糰放入雪櫃(普通格)雪30分鐘作為鬆弛
(5) 揉成每份12g的圓球,放在焗盤上壓平
(6) 用180度焗20分鐘。
* This cookie taste better the next day , taste more earl grey
Outrageous chocolate cookies

Outrageous chocolate cookies
224g (8oz) semisweet chocolate, roughly chopped
4 tablespoons (56g) unsalted butter
2/3 cup (94g) all-purpose flour, spooned and leveled
½ teaspoon baking powder
½ teaspoon salt
2 large eggs
¾ cup (132g) packed light brown sugar or 75G icing sugar
1 teaspoon vanilla extract
336g (1 package/12oz) semisweet chocolate chunks
Preheat oven to 175ºC/350ºF; line 2 large baking sheets with parchment or baking paper.
Heat chopped chocolate and butter in a microwave-safe bowl in 20-second increments, stirring in between, until almost melted; do not overheat – I used a double-boiler for that.
In another bowl, whisk together flour, baking powder, and salt.
In a mixing bowl, beat eggs, brown sugar, and vanilla on high speed until light and fluffy. Reduce speed to low; beat in melted chocolate. Mix in flour mixture until just combined. Stir in chocolate chunks.
Refrigerate dough for 5-10 minutes or until firm enough to be scooped and place on baking sheets.
Drop heaping tablespoons of dough 5-7cm (2-3in) apart onto baking sheets. Bake, rotating sheets halfway through, until cookies are shiny and crackly yet soft in centers, 12 to 15 minutes.
Cool on sheets 10 minutes; with a thin metal spatula, transfer to racks to cool completely.
Store them in an airtight container at room temperature for 2-3 days.
Makes 2 dozen
Pistachio and orange blossom water madeleines from Patricia Scarpin
Pistachio and orange blossom water madeleines
1 large egg
40g caster sugar
pinch of salt
25g unsalted pistachios
2 tablespoons of pure icing sugar
50g unsalted butter + 1 tablespoon for greasing pan
45g all purpose flour
1 tablespoon orange blossom water
icing sugar for dusting
Preheat the oven to 220ºC/428ºF; melt all the butter over a low heat, then leave to cool. Set aside a scant tablespoon of the cold, melted butter for greasing the pans, then flour them. Grind pistachios with icing sugar until fine.
Beat the egg, caster sugar and salt in a bowl for about 5 minutes, preferably with an electric mixer of some sort, until it’s as thick as mayonnaise or about 3 times the original volume-it will be pale and a lemony white. Then sprinkle in the flour; you can hold a sieve above the egg and sugar mixture, put the flour in it and shake it through.
Fold in the flour with a wooden spoon, fold in the butter along with the orange blossom water and the pistachio/icing sugar mixture. Mix well, but not too vigorously.
Spoon batter into tins, about 1 teaspoonful in each should do for mini madeleines or 1 tablespoon in each for regular sized madeleines. Don’t worry about covering the molded indentations; in the heat of the oven the mixture will spread before it rises. Bake for 7 minutes, or until springy to touch (though check after 5 minutes). Turn out and let cool on a rack, then arrange on a plate and dust with icing sugar.
This recipe made 12 regular madeleines for Lorraine; I doubled the recipe and got 15 regular and 12 large ones
Vanilla fleur de sel, caramel and chocolate Dobos Torte.
Vanilla fleur de sel, caramel and chocolate Dobos Torte.
Sponge Cake
6 large eggs, separated, at room temperature
1 1/3 cups (162g) confectioner's (icing) sugar, divided
1 teaspoon (5ml) vanilla extract
1 cup plus 2 tablespoons (112g) sifted cake flour (SUBSTITUTE 95g plain flour + 17g cornflour (cornstarch) sifted together)
pinch of salt
1.Position the racks in the top and centre thirds of the oven and heat to 400F (200C).
2.Line 2 half sheet pans with parchment paper and spray with cooking oil.
3.Beat the egg yolks, 2/3 cup (81g) of the confectioner's (icing) sugar, and the vanilla in a medium bowl with a mixer on high speed until the mixture is thick, pale yellow and forms a thick ribbon when the beaters are lifted a few inches above the batter, about 3 minutes.
4.In another bowl, using clean beaters, beat the egg whites until soft peaks form. Gradually beat in the remaining 2/3 cup (81g) of confectioner's (icing)sugar until the whites form stiff, shiny peaks. Using a large rubber spatula, stir about 1/4 of the beaten whites into the egg yolk mixture, then fold in the remainder, leaving a few wisps of white visible. Combine the flour and salt. Sift half the flour over the eggs, and fold in; repeat with the remaining flour.
5.Spread the batter amongst the sheet pans. Bake at 400F until lightly golden on top, about 7 min. Let the sponge cool.
Vanilla Fleur de Sel, Chocolate and Caramel Buttercream
4 large eggs, at room temperature
1 cup (200g) caster (ultrafine or superfine white) sugar
4oz (110g) bakers chocolate or your favourite dark chocolate, finely chopped
2 sticks plus 2 tablespoons (250g) unsalted butter, at room temperature
175 grams caramel syrup
3 grams vanilla fleur de sel
1.Whisk the eggs with the sugar until pale and thickened, about five minutes. You can use a balloon whisk or electric hand mixer for this.
2.Fit bowl over a water bath. Cook the egg mixture, whisking constantly, for 2-3 minutes until you see it starting to thicken a bit. Whisk in the finely chopped chocolate and cook, stirring, for a further 2-3 minutes.
3.Scrape the chocolate mixture into a medium bowl and leave to cool to room temperature. It should be quite thick and sticky in consistency.
4.Fold in the caramel syrup and the fleur de sel.
5.When cool, beat in the soft butter, a small piece (about 2 tablespoons/30g) at a time. An electric hand mixer is great here, but it is possible to beat the butter in with a spatula if it is soft enough. You should end up with a thick, velvety chocolate buttercream. Let it chill for a couple of hours.
Milk Chocolate Chantilly
250 grams heavy cream
90 grams milk chocolate, chopped into small pieces
1.Boil the cream and pour over the milk chocolate. Stir until the chocolate has melted. Let this ganache rest in the refrigerator for 24 hours. Then whip it as whipped cream.
Caramel Decorations
200 grams of sugar
1.In a small saucepan, sprinkle about a quarter of the sugar into an even thin layer.
2.Turn the heat up to medium high. When the sugar starts to melt and turn caramel, sprinkle another 50 grams of sugar approximately and stir gently. The heat from the melted sugar will start to melt the new sugar we added. proceed like that until all sugar has been added and it has melted into a dark caramel.
3.Shock the pan quickly in an ice bath and let the caramel cool slightly until it is not too runny but not too hard.
4.Oil a round cookie cutter that is about 2" in diameter. With a spoon, lift some of the caramel and wrap it around the cookie cutter. It might take a couple of tries to get the consistency right.
5.Let the caramel harden around the ring for a few seconds and then gently remove it. Store the caramel decorations in an air tight container. Depending on the humidity in your kitchen, they might last up to a day.
Assemble the Torte
1. Cut the half sheet pan of sponge in half. Flip over and peel off the parchment from the bottom. Divide the buttercream into five equal parts.
2.Line a quarter sheet pan with parchment paper. Place the first layer of sponge on top of it. Spread one fifth of the buttercream, top with another layer of sponge. Proceed like that until all four layers of sponge are used and finished with a leyr of buttercream. Freeze the cake for an hour to make it easier to cut.
3. Whip the milk chocolate chantilly and reserve in the fridge.
4. Cut the torte into rectangles. Spoon quenelles of the milk chocolate chantilly on top of the torte. Sprinkle vanilla fleur de sel on top and top with caramel circles. Serve immediately.
from Cannelle Et Vanille at 12:30 AM
Raspberry and Almond Shortbread Thumbprints/ Rose thumprints shortbread/ jam tart
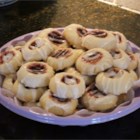
make 3 dozen
Ingredients
1 cup butter, softened
2/3 cup white sugar
1/2 teaspoon almond extract
2 cups all-purpose flour
1/2 cup seedless raspberry jam
1/2 cup confectioners' sugar
3/4 teaspoon almond extract
1 teaspoon milk
Directions
1.Preheat oven to 350 degrees F (175 degrees C).
2.In a medium bowl, cream together butter and white sugar until smooth. Mix in 1/2 teaspoon almond extract. Mix in flour until dough comes together. Roll dough into 1 1/2 inch balls, and place on ungreased cookie sheets. Make a small hole in the center of each ball, using your thumb and finger, and fill the hole with preserves.
* FREEZE IT FOR 15 MINS BEFORE BAKE
3.Bake for 14 to 18 minutes in preheated oven, or until lightly browned. Let cool 1 minute on the cookie sheet.
4.In a medium bowl, mix together the confectioners' sugar, 3/4 teaspoon almond extract, and milk until smooth. Drizzle lightly over warm cookies.
--------------------------------------------------
Rose thumbprint
Ingredients
1 cup butter, softened
1/3 cup icing sugar
1/2 teaspoon Rose extract
2 cups all-purpose flour
+ 10g rose powder
1/2 cup seedless rose jam
1/2 cup confectioners' sugar
3/4 teaspoon rose extract
1 teaspoon milk
Direction same as above
---------------------------------------------
1/2 cup butter, softened
3/4 cup sugar
2 eggs
1 tsp pure vanilla extract
1 tsp lemon juice
1 3/4 cup flour
1 tsp baking powder
1/4 tsp baking soda
1/2 cup sugar, poured onto a plate
Jam or jelly
In a large bowl, cream the butter with a hand mixer. Gradually add the sugar to the butter and beat until light and fluffy.
Add each egg, beating between additions. Add vanilla extract and lemon juice. Sift together the flour, baking powder and baking soda. Combine the flour mixture with the butter mixture and mix well. Chill in the fridge for 1/2 hour.
Preheat the oven to 350 degrees. Scoop out a small amount of dough and roll it in the sugar on the plate. Place the dough on a greased cookie sheet. With your thumb, make a small indentation. In the indentation, add a small amount of jam (use a 1/2 tsp measuring spoon). Repeat with the rest of the dough. The cookie do spread alot, so do not put anymore than 8 dough balls on a tray.
Bake for 15 minutes. Remove from tray and cool on a cooling rack. Allow the cookie to cool completely
Sablés au thé vert Matcha cookies

Sablés au thé vert Matcha
2 dozen cookies
recipe revised from lovecool
Confectioners sugar // 1/2 cup 60 G
Unsalted butter, cut into cubes // 5 oz (142G)
All-purpose flour // 1 3/4 cup (8.5 oz) 195G / 110g AP 85 g cake flour
Egg yolks, large // 3
Matcha (powdered green tea) // 1.5 tbps
Granulated sugar (for coating) // 1/2 cup 115g
1. Preheat the oven to 350F.(180 D) Line a sheet pan with parchment paper.
2. Whisk the confectioner’s sugar and green tea together in a bowl.
3. Add the butter and green tea/sugar mixture to the bowl of a stand mixer fitted with the paddle attachment. Mix until smooth and light in color.
4. Add the flour and mix until well combined.
5. Add the egg yolks and mix just until the eggs are fully incorporated and a mass forms.
6. Form the dough into a disk and chill in the refrigerator until firm (about 30 minutes).
7.Roll the dough out to ½” thickness.
8. Cut the dough with a leaf cookie cutter.
9. Toss each cut cookie in a bowl of granulated sugar to coat.
10. Place the sugar-coated cookie on a parchment lined pan. Bake at 350F for 12-15 minutes, or until slightly golden around the edges.
-----------------------------------------
材料: (約20個份量,視曲奇厚薄而定)
無鹽牛油 70g (室溫回軟)
糖粉 50g
鹽 1g
蛋黃 1個 (室溫)
低筋麵粉 100g
抹茶粉 10g
椰絲 20g
綠茶茶葉碎 適量
糖粉 適量
製法:
牛油放室溫軟化後,置大碗中壓成軟泥狀,再加入糖粉和鹽,以打蛋器打發成忌廉狀。
加入蛋黃,拌勻。
將麵粉及抹茶粉一起篩入牛油混合物中,用橡皮刀拌勻。
拌入椰絲,輕輕拌成麵糰。
將麵糰放在撒上麵粉的工作台上,用手輕輕滾動,塑成直徑約3~4cm的圓柱狀,再包上保鮮紙,放入雪櫃雪最少1個小時至堅硬。
取出麵糰,均勻地灑上糖粉。用利刀切割成每片厚約1cm的曲奇,有間距地排放在已墊上牛油紙的焗盤上,於表面均勻地灑上茶葉碎及糖粉,並用手略為按實。
放入已預熱170度的焗爐,焗10~12分鐘或焗到曲奇週邊變成金黃色,就可以出爐了,在鋼架上放涼後,即完成這款《酥脆抹茶椰香曲奇》。
注意:
曲奇焗好後,記住要在鋼架上放涼,否則口感沒那麼酥脆。
抹茶遇熱後顏色會變淡,所以記得將放涼後的曲奇存放在不透光的容器裡。
Rose and cranberries cookies
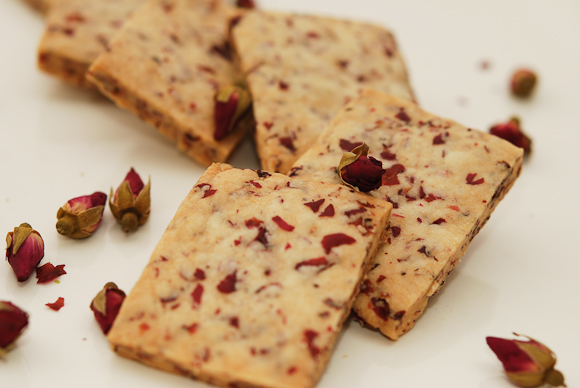
Rose and cranberries crackies
20 pieces
Powdered sugar // 50g
Butter // 100g
Salt // 1/4 tsp
Cake flour // 180g
Baking soda // 1/4 tsp
Dried rose // 1 cup
Dried cranberries // 1/3 cup
Water, cool // 1 tbsp
1. Beat together butter, powdered sugar and salt until cream like. Remove stalk and sepals using fingers. Soap the dried rose petals in water for 10 minutes. (The dough just need a little bit of water, but I would like to add some strong rose scent in it, so that's why it's 1 tbsp).
2. Combine cake flour and baking soda and sift into the butter mixture. Add in the soaped rose petals and water, cut to combine until a rough dough is formed.
3. Roll into a 0.5cm thick rectangle sheet. Chilled for 20 minutes. Cut into 20 equal pieces.
4. Bake 329F/165C for 20 minutes, lowered to 311F/155C for another 10 minutes (30 minutes in total)
Mocha cookies
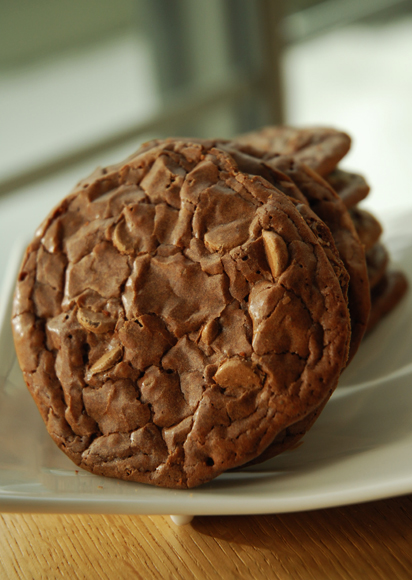
Unsweetened chocolate, chopped // 4 ounces (1/2 cup)
Semisweet chocolate chips // 3 cups (375g)
Unsalted butter, cut into bits // 1 stick (1/2 cup)
All-purpose flour // 1/2 cup
Baking powder // 1/2 tsp
Salt // 1/2 tsp
Eggs at room temperature // 4 large
Sugar // 1 1/2 cups
Instant espresso powder // 2 tbsp
Vanilla extract // 2 tsp1.
1. In a metal bowl set over a saucepan of simmering water melt the unsweetened chocolate, 1 1/2 cups of the chocolate chips, and the butter, stirring until the mixture is smooth, and remove the bowl from the heat.
2. In a small bowl stir together the flour, the baking powder, and the salt.
3. In a bowl beat the eggs with the sugar until the mixture is thick and pale and beat in the espresso powder and the vanilla. Fold the chocolate mixture into the egg mixture, fold in the flour mixture, and stir in the remaining 1 1/2 cups chocolate chips. Let the batter stand for 15 minutes.
4. Drop the batter by heaping tablespoons onto baking sheets lined with parchment paper and bake the cookies in the middle of a preheated 350° F. oven for 8 to 10 minutes, or until they are puffed and shiny and cracked on top. Let the cookies cool on the baking sheets, transfer them to racks, and let them cool completely.*notes*1. Like any other chocolate desserts, these cookies tasted even better the day after as it will get moist over time. Melt in your mouth
订阅:
博文 (Atom)